

Film assistant
Destruction in Blender
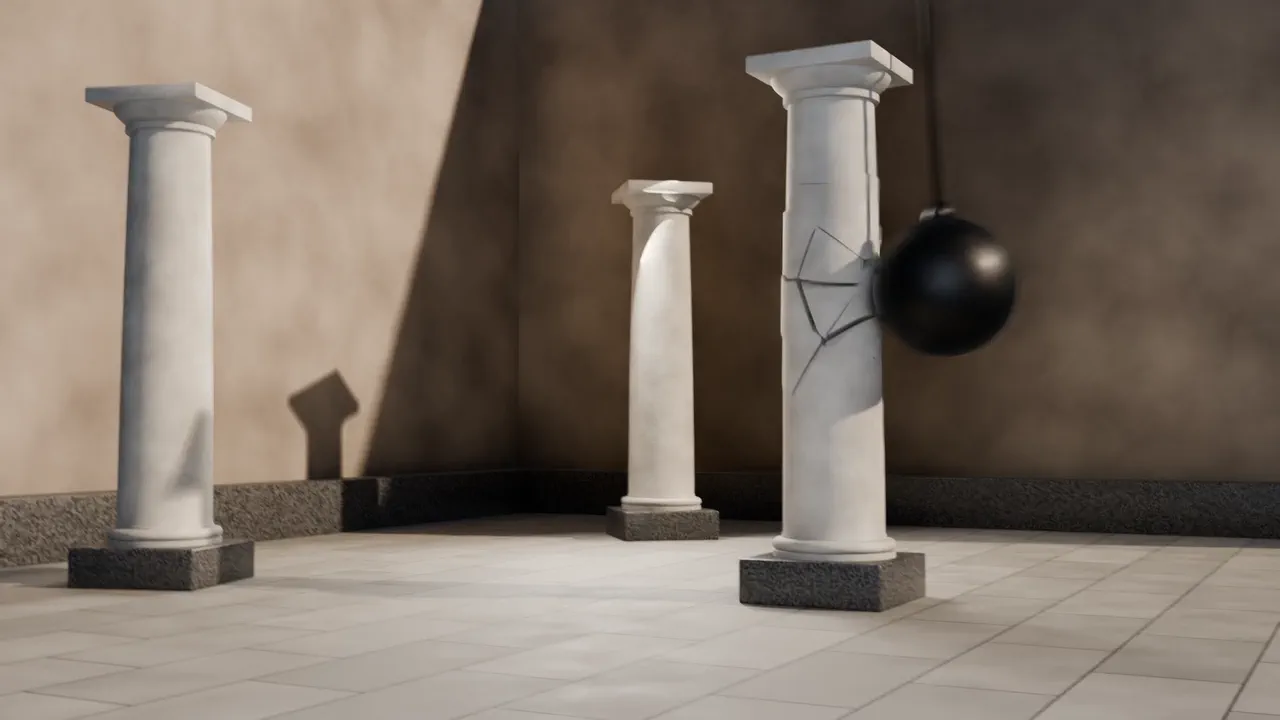
Break an object in your Blender scene apart: fractured pieces, falling debris and dust, and a camera that catches the moment.
Runs in Blender on your computer
- Best for
- Crashes, collapses and drop tests, made in your own Blender scene.
- Runs in
- Blender 4.2 or later
- Time
- 15 to 30 min
- Cost
- The work in Blender is free. NOLGIA generation inside it is priced as usual.
Already have an account? Sign in
Create a free account and NOLGIA Agent opens with this preset. It works in Blender through the NOLGIA plugin.
Start it from your agent
Paste this into Claude Code, Claude Desktop, Cursor or any agent with NOLGIA connected, with Blender open. The agent follows NOLGIA's workflow for this preset step by step, and asks before it changes anything big.
Use NOLGIA to break something apart in my open Blender scene: fracture it, simulate the debris and dust, and give me a camera that shows the moment clearly.
In Claude Code it is also a command: /mcp__nolgia__blender-destruction. Open in Claude needs NOLGIA added to Claude as a connector.
What it does
Pick an object in your open Blender scene and the NOLGIA assistant breaks it apart for you. It fractures a copy into pieces, holds them together until the moment it breaks, then lets a hit, a push, a blast or a collapse do the rest, with debris that has weight and a touch of dust.
Everything stays editable. The number of pieces, how strong the pieces hold and the force of the hit sit on one controls object, so you can break it again and re-run the simulation. Your original object is kept, hidden, and a safety copy of your file is saved before anything changes.
You need Blender 4.2 or later and the NOLGIA plugin for Blender. The work in Blender is free. If you ask for something made with NOLGIA along the way, like a background, it is priced as usual and you are told the cost first.
Use cases
- A wall or a building collapsing in a film shot
- A product drop test or a crash for an ad
- Breaking props for a game trailer
The workflow
The written steps your agent follows in Blender, the same for every agent: the rules every Blender workflow keeps (a safety copy first, everything stays editable, a preview after each change), then this preset's own steps.
Read the workflow
Rules for every Blender workflow
These instructions are served to the agent with every Blender preset in the Film assistant category. The agent works through the NOLGIA Bridge tools (nolgia_app_*) on Blender running on the person's own computer.
Before anything changes
- Call
nolgia_app_status. If Blender is not listed, stop and tell the person in two lines: install the NOLGIA plugin for Blender from nolgia.ai/plugins/blender, then press N in the 3D Viewport, open the NOLGIA tab and sign in. Do not guess or continue without it. - Call
nolgia_app_info. Read what is really open: the file, the scene, frame range, fps, render engine, resolution, collections and cameras. Describe it back in one sentence so the person can correct you. - If the file has a path, make a safety copy first with a
nolgia_app_runthat callsbpy.ops.wm.save_as_mainfile(filepath=<same folder>/<name>_before_nolgia.blend, copy=True). If the file was never saved, ask the person to save it (File, Save As) before you start, and wait. - Ask only the questions the workflow lists. Offer a sensible default for each so the person can just say "go".
While working
- Change the scene in small steps: one
nolgia_app_runper logical step, each returning a short summary inresult(names created, counts, frame ranges). - Never delete, rename or move the person's existing objects, materials or collections unless they asked. Put everything you add in a new collection named after the workflow (for example
NOLGIA Destruction). - Keep everything editable: modifiers stay live, simulations stay as cache settings plus a bake, materials stay as nodes with the controls exposed on a labelled group or a clearly named node. No applied modifiers or joined meshes unless the workflow says so.
- After each visible change, call
nolgia_app_previewat a representative frame and look at the image before moving on. If it looks wrong, fix it before the next step. Do not describe a result you have not seen. - Long bakes and renders: run them, and if a tool hands back a
command_id, follow it withnolgia_app_commandinstead of starting it again. - If Python fails, read the traceback in
error, fix the code and try once more. After two failures on the same step, explain what failed in plain words and ask how to proceed.
Blender Python that bites
- Operators act on the view layer's active object and selection, and some (for example
bpy.ops.rigidbody.constraint_add) ignoretemp_override. Before every operator, setview_layer.objects.activeand the selection to exactly the objects you mean, and check afterwards that none of the person's own objects changed. - A driver that reads a custom property added in the same script can evaluate to 0. After adding properties and drivers, call
obj.update_tag()andbpy.context.view_layer.update(), then check every driver'sdriver.is_validand read one driven value back. - Never put keyframes and a driver on the same channel. Key a custom property instead and drive the channel from it.
- Names must be unique in a file: suffix actions, materials and objects you create per part with the part's name.
- Imported models arrive flat shaded and scaled to about 1 m: shade them smooth and scale them to real size. The GLB's Y-up to Z-up turn is stored as a quaternion, so
rotation_eulerreads 0: readrotation_quaternionor the world matrix. - Per-polygon Python loops over a large generated mesh can exceed the command time limit; read and write mesh data with
foreach_get/foreach_setand numpy instead. nolgia_app_exportrenders from the scene camera. To export from another camera, setscene.camerafirst and put it back afterwards.
Using NOLGIA where it helps
- Missing 3D models: generate them with
nolgia_generate_3dfrom a picture the person gives you (or one made withnolgia_text_to_image), then bring them in withnolgia_app_import. - Backgrounds, skies and texture plates: make them with
nolgia_text_to_imageand import them as images. - These generations cost credits: say what you are about to make and roughly what it costs (read it from the tool's estimate) before you run it. Work in Blender itself is free.
Finishing
- Save the file (
nolgia_app_runwithbpy.ops.wm.save_mainfile()), never over a different file. - Export a short preview with
nolgia_app_export(mp4for motion,pngfor a still) so the person has it in their NOLGIA library, and show the still. - Tell the person, in a few lines: what you built, where it lives in the scene (collection names), the one or two controls they are most likely to adjust and where those are, and the path of the safety copy.
Destruction in Blender
Break an object in the person's scene with a believable collapse: fractured pieces, debris with weight, dust, and a camera that reads the moment. The result stays editable: the fracture can be redone at a different piece count and the simulation re-baked.
Ask
- What breaks? (Default: the selected object; if nothing is selected, list the three largest meshes and ask.)
- What breaks it? A hit from an object, a push from one side, an explosion from inside, or gravity (a collapse). (Default: a hit from the front.)
- How long is the shot, and when does the break start? (Default: 4 seconds, break at 1 second.)
- How many pieces: few and chunky, or many and fine? (Default: chunky, about 40.)
Build
- Fracture a copy, keep the original. Duplicate the target into the
NOLGIA Destructioncollection and hide the original (do not delete it). Prefer the Cell Fracture extension if it is installed (bpy.ops.object.add_fracture_cell_objects); check withaddon_utils.check("bl_ext.blender_org.cell_fracture")or the legacyobject_fracture_cell. It is not bundled with Blender 4.2 or later, so the fallback below is the usual path. If it is not installed, do not install anything without asking: build a Voronoi fracture yourself (scatter points inside the bounds, weighted toward the impact point, and cut the mesh into convex cells with bmesh bisects per point pair), or ask the person to install Cell Fracture from Get Extensions. Keep piece count, seed and impact bias as custom properties on an empty namedDestruction Controlsso the fracture can be regenerated. To refracture, free the bake first, then delete the constraint empties, then the pieces: deleting pieces while joints still point at them can crash Blender. - Hold it together until the moment. Make every piece an active rigid body (mesh or convex hull collision, mass from volume), and connect neighbours with breakable Fixed constraints whose breaking threshold is exposed on the controls empty. With 60 substeps the threshold is an impulse per substep: start near 5 to 10, scaled by the area the two pieces share. Pieces start still.
- The trigger. A hit: a passive or animated rigid body (a simple rounded block or the person's own object) moving through the target at the break frame, with enough speed to exceed the threshold. A push or explosion: a Force field (Force or Wind) keyframed on at the break frame, centred at the impact point. A collapse: remove support by animating the lowest constraints' enabled state off.
- Ground and weight. Make sure there is a passive floor. Give floors and supports Mesh or Convex Hull collision: a Box shape is centred on the object's origin, not its mesh, so pieces float or sink when the origin is off centre. Set the rigid body world to 60 substeps and 20 solver iterations for stability; gravity stays real unless the person wants slow motion (then scale time instead).
- Dust and small debris. A particle system emitted from the fracture faces (the inside faces), starting at the break frame for about 0.5 s: small instanced chips plus a smoke or dust puff (Quick Smoke on a small emitter, or a volume shader on a scaled cube keyed in density if the person wants it fast). Keep dust subtle: debris sells weight, dust sells scale.
- Camera. A new camera
Destruction Camframing the object with room for the debris to fall, at eye level or slightly low, 35 to 50 mm. Add a small push-in over the shot, and a short shake (a noise modifier on rotation) for 4 to 8 frames at the break. Set it as the scene camera only after asking. - Bake. Bake the rigid body cache for the shot's frame range. Follow long bakes with
nolgia_app_command.
Check
- Preview three frames: just before the break, the break, and 1 second after. Pieces must not jitter before the break, must not explode outward unless an explosion was asked for, and must settle on the floor without sinking.
- If pieces fly off too fast, lower the trigger speed or raise the mass. If nothing breaks, lower the breaking threshold.
Deliver
Save, export an mp4 preview of the shot, and tell the person the controls: piece count and seed (re-run to refracture), breaking threshold, and trigger speed or force strength, all on Destruction Controls.
Try it in Blender.
Install the free NOLGIA plugin for Blender, sign in, then ask your agent.