

A short film with AI: the pipeline from script to final cut
The point of a short is the pipeline, not any one shot. Last Train is twenty five seconds long and has one lead, one busker, one platform and one chrome case. Here is every stage that made it, with the real prompts, the model for each stage, and the places the pipeline pushed back.
- 13 min read
Last Train is a 25 second film made for this guide: Vale runs for the last train, misses it, and laughs. Everything in it is real output from the company's own account, made on the live composers in the order below, and every person in it is fictional. The same set of shots is measured, object by object, in the consistency guide.
Two honest limits first. A saved character carries its wardrobe and its written description into every shot; we have not measured whether it is one person from shot to shot, and this guide does not claim it. And the model we planned to shoot on refused every character reference we sent it, so the film was made on a different model than the plan said. Both are in the steps.
What goes wrong
| Mistake | Why it fails | Fix |
|---|---|---|
| Shooting the first clip before the cast exists | Every shot invents its own person, coat and platform | Save the character, the location and the prop still first |
| Sending a character straight to a video model | Some models refuse a photoreal person as a reference; one treats the portrait as the first frame and returns a portrait-shaped clip | Make a 16:9 frame in the image composer with the cast attached, then animate that frame |
| One long shot for a whole beat | Motion drifts, props migrate, the set repeats | 4 to 6 seconds per shot, one action each; cut where it drifts |
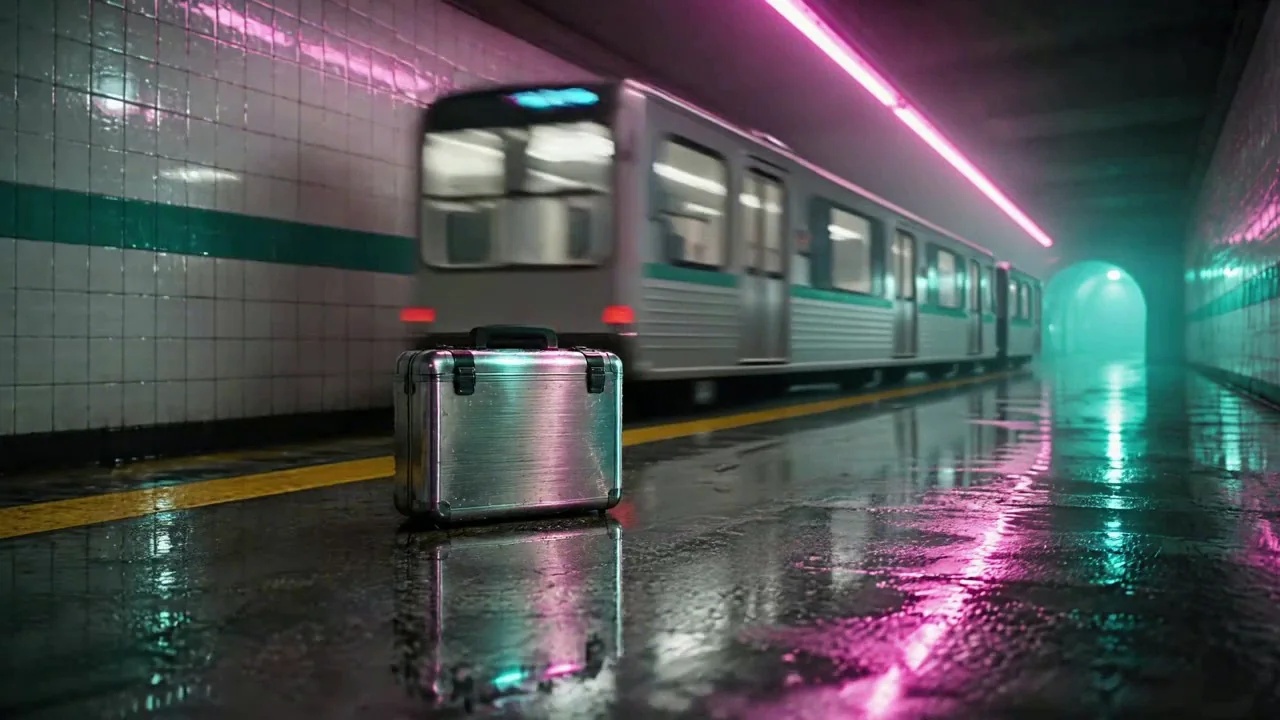
| Describing the prop differently each time | A chrome case becomes a briefcase, then a bag | One sentence for the prop, pasted into every prompt, and a still of it for inserts |
| Grading each clip | Five clips graded five ways look like five films | Grade the timeline once in Studio |
Before you start
- A script with named beats. Five beats is twenty five seconds.
- One sentence per character, per place and per prop, written the way a costume or art department would write it. These sentences are pasted, unchanged, into every prompt.
- A NOLGIA account. Characters, Locations, the composers and Studio come with it.
- Patience for one redo per stage. Ours needed five, and the guide says where.
LAST TRAIN. Night. An underground platform, magenta neon over white tiles. 1. Vale runs for the last train, a chrome case in one hand. 2. She passes Ozzy, the busker, who turns to watch. 3. The doors close in her face and the train pulls away. 4. The case, set down on the wet platform. 5. On the bench, out of breath, she laughs.
Save the cast, the set and the prop
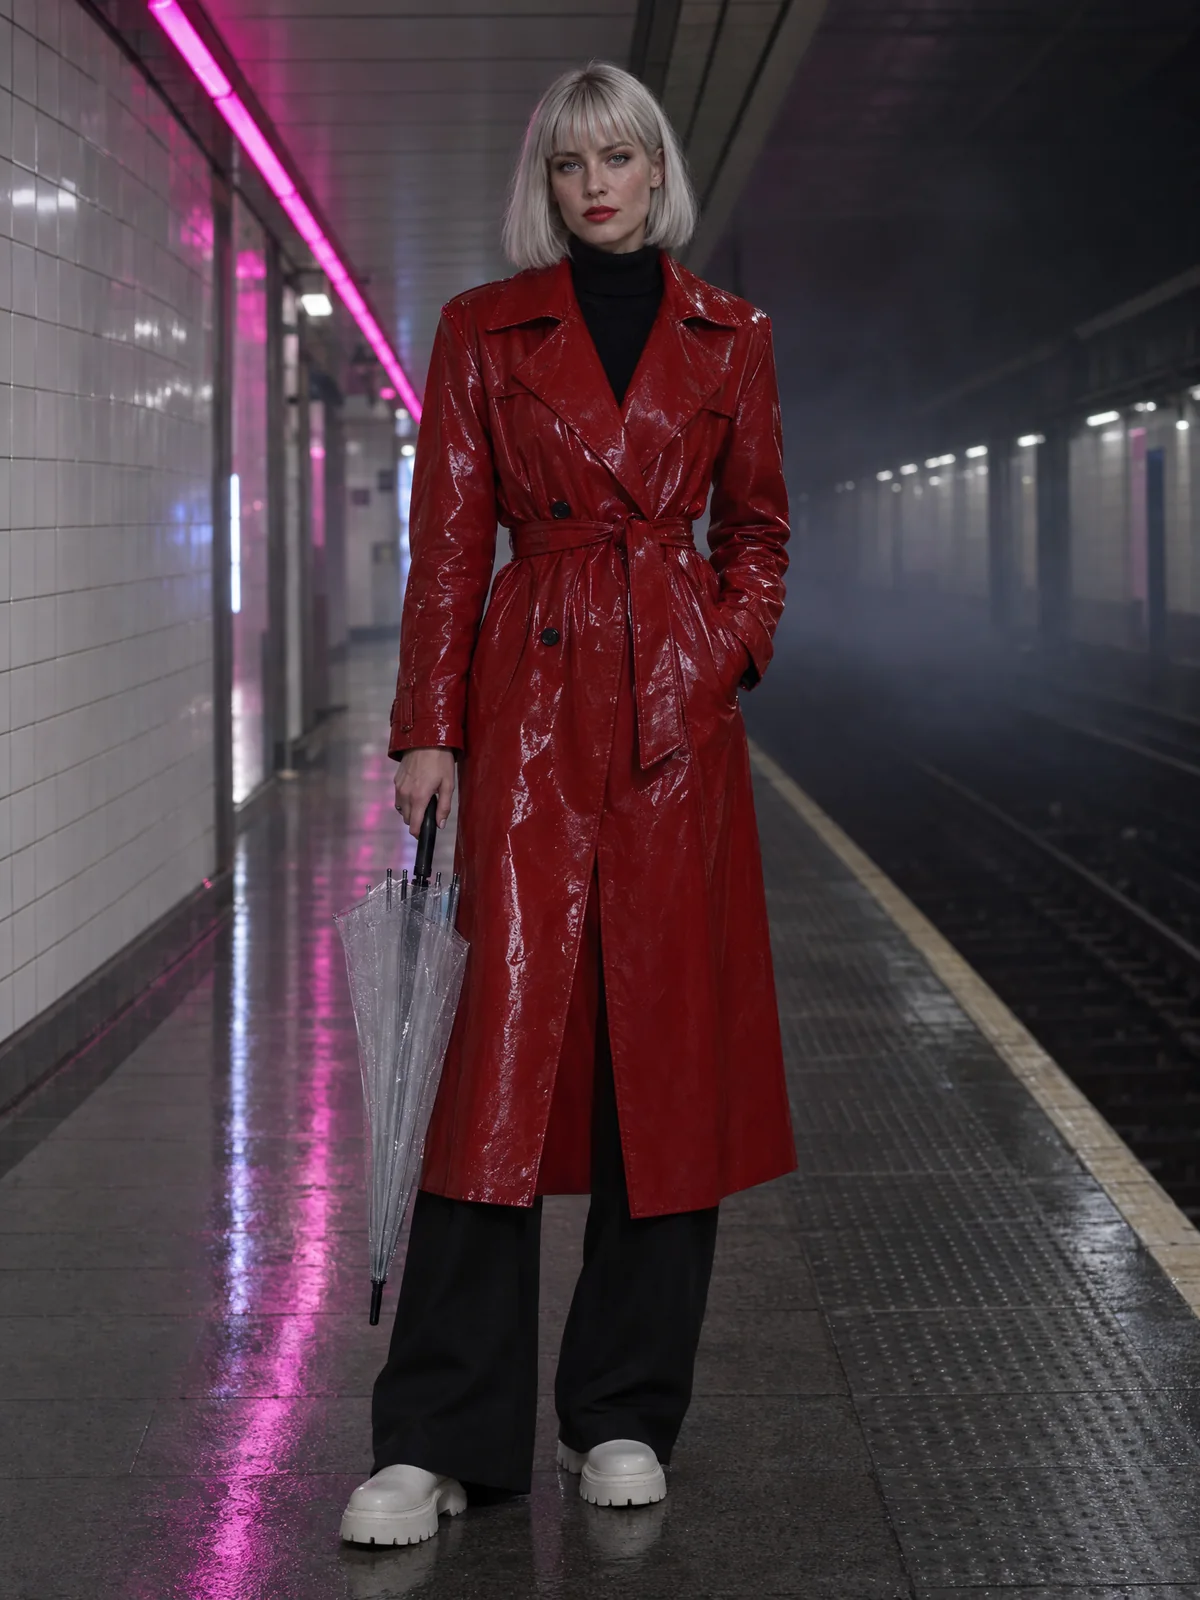
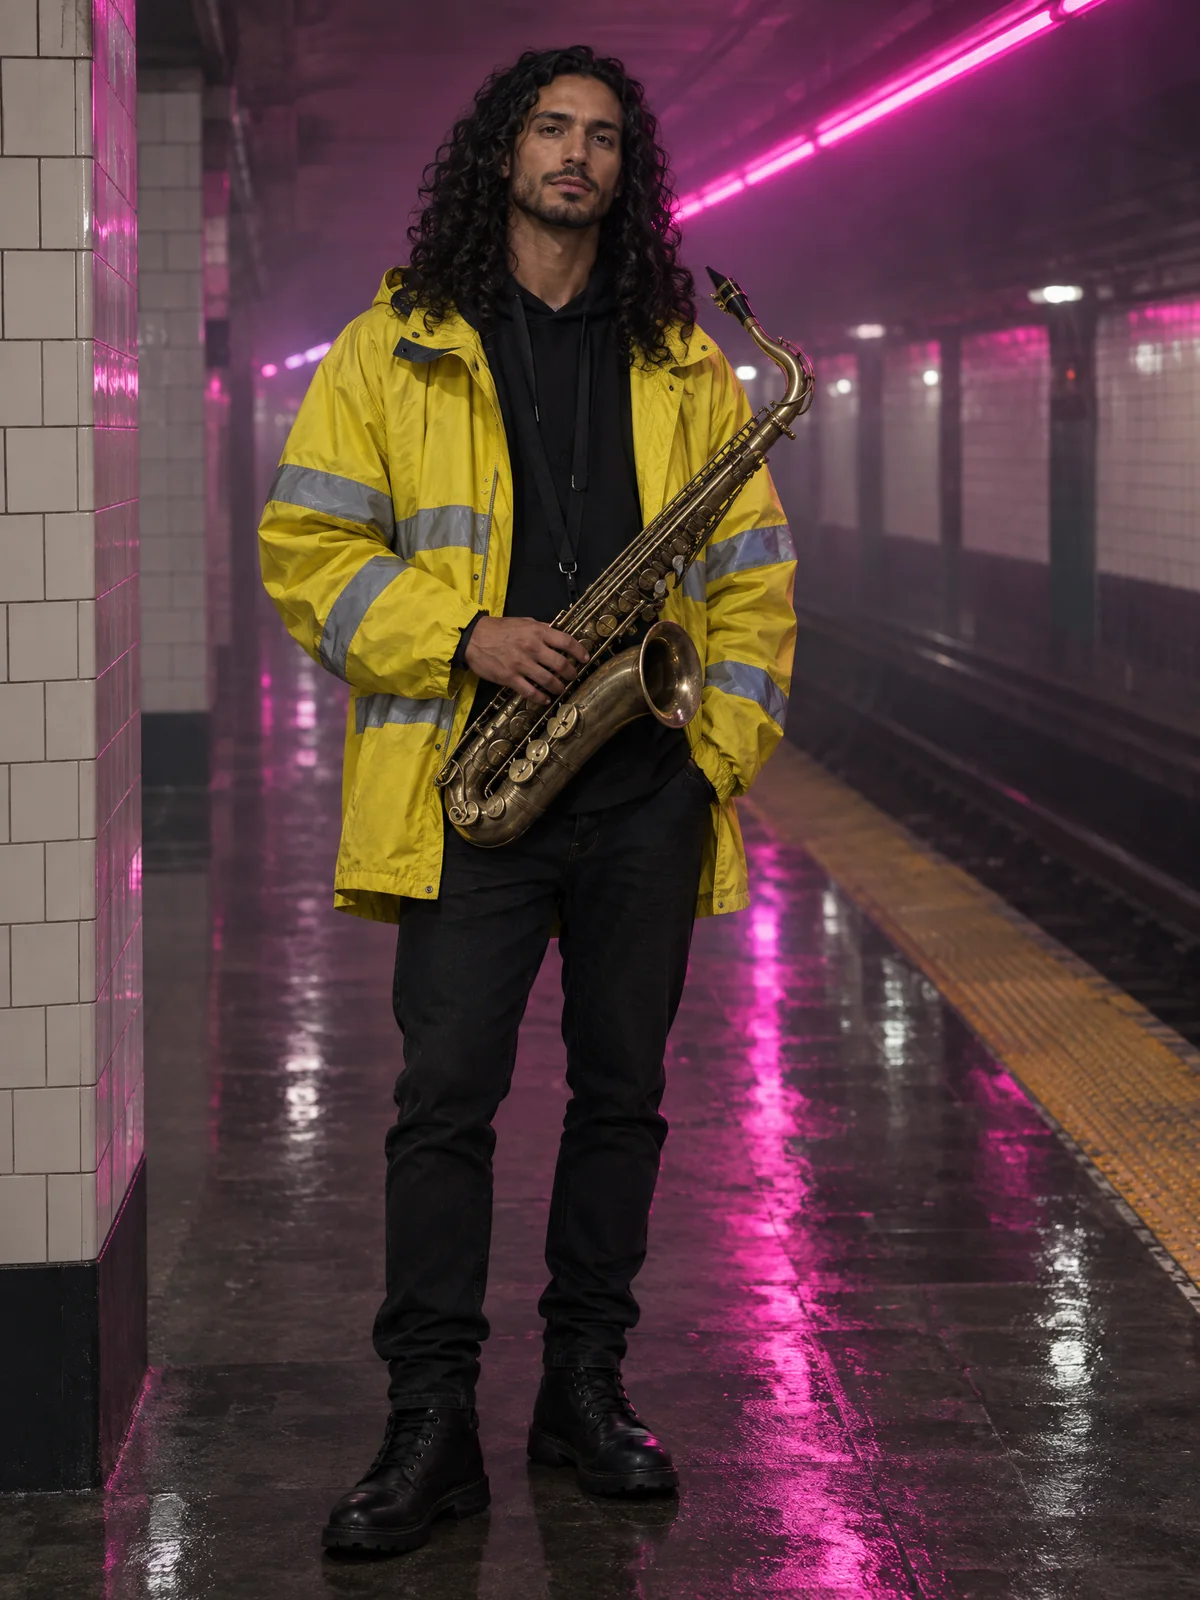
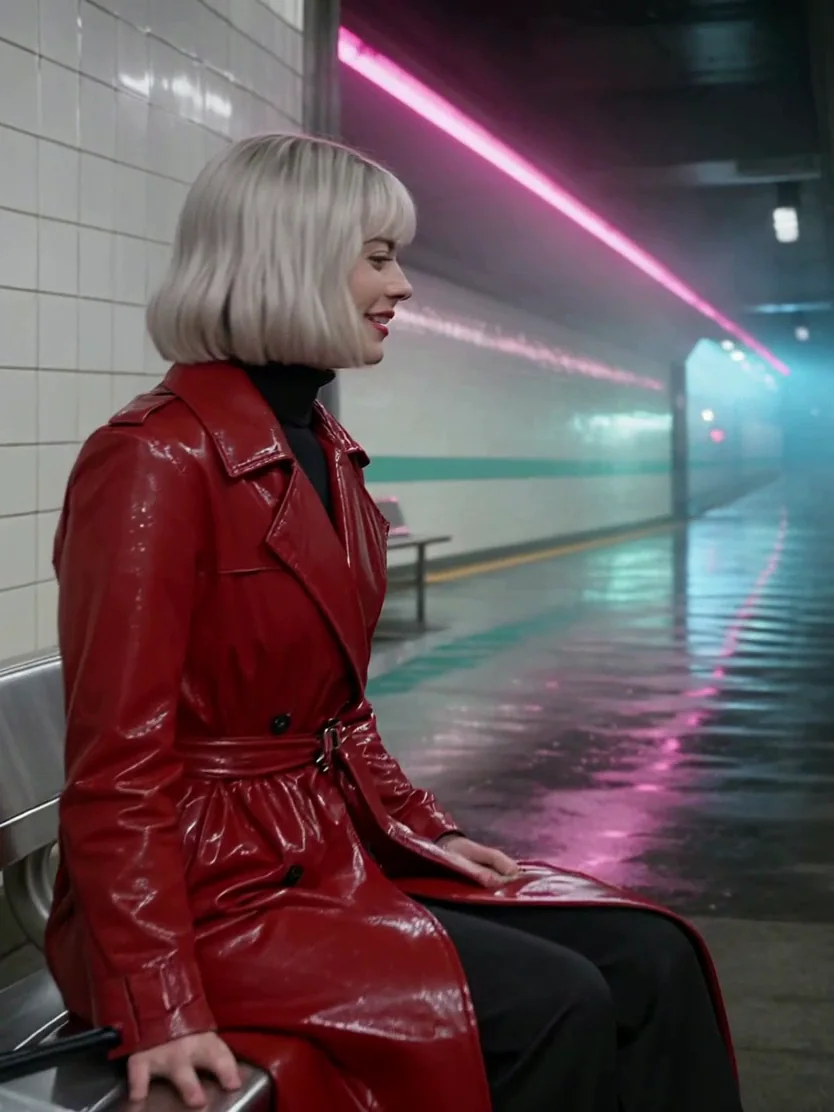
Open Characters. Type a name and the character's one sentence as the description, open Add reference images, and either upload a photo or use Generate with a portrait prompt and a model. With the portrait selected as the reference, press Create character. We made Vale this way on GPT Image 2.5 Flare, and Ozzy from a still made the same way.
Full-length portrait of a woman in her late twenties, silver-blonde chin-length bob with a straight fringe, pale skin, red lipstick, wearing a glossy red vinyl trench coat belted closed over a black ribbed turtleneck, black wide-leg trousers and chunky white boots, holding a folded transparent bubble umbrella, standing on an underground subway platform with white tiles and a magenta neon strip along the ceiling, wet floor reflections, thin haze. Photoreal, cinematic, editorial fashion lighting, no text, no logos.
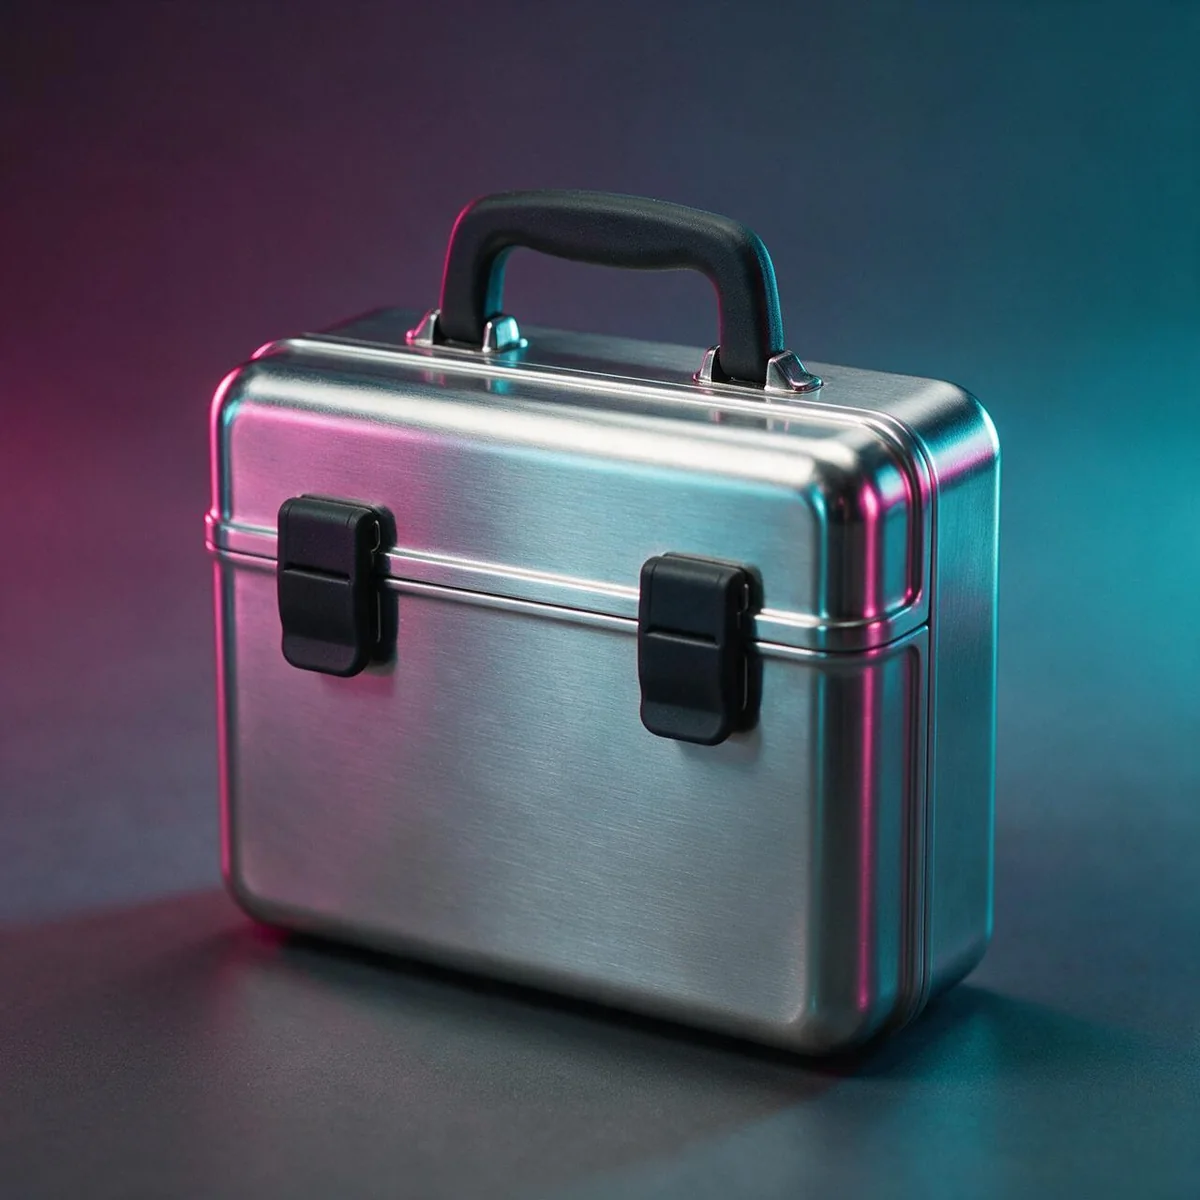
Open Locations and do the same for the place: a name, a description, the one sentence as the canonical description, and a still from your Library or an upload. Our platform is a Seedream 5.0 Pro still. The prop is a still too, made in the image composer and kept in the Library; it rides into an insert as a reference image and into every other prompt as one sentence.
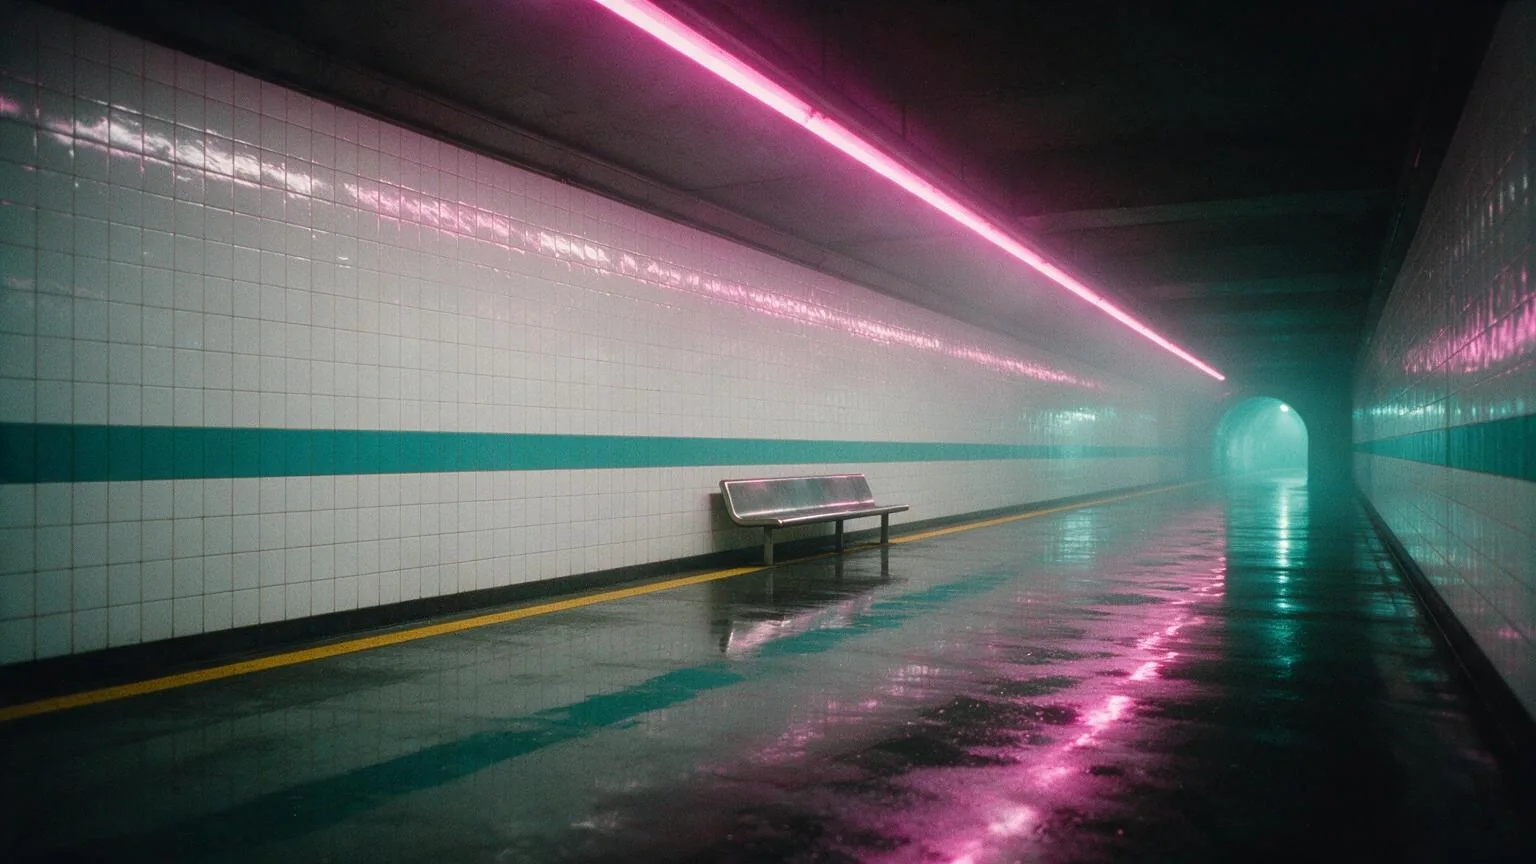
An empty underground subway platform at night: glossy white tiles with one teal stripe at waist height, a long magenta neon strip along the ceiling, wet floor with mirror reflections, thin haze, a yellow safety line along the platform edge, a single steel bench, the tunnel mouth glowing cyan. No readable text or signs.
Make each shot as a frame first
Open the image composer. Pick GPT Image 2.5 Flare, set the shape to 16:9, then press Characters and pick Vale, and Location and pick Halcyon Street station. The composer shows a chip for each. Write the shot as one moment, name the character with an @ in the prompt, and press Generate images. Five frames, one per shot, cost less than one video take between them and are where the wardrobe, the props and the framing get fixed.
@Vale mid-sprint along the empty platform towards the camera, her red vinyl trench coat flying open over the black turtleneck, the folded transparent umbrella in her left hand and a small brushed-chrome hard-shell case with a black rubber handle and two black latches in her right, white boots splashing the wet tiles. Wide low shot, the magenta neon strip above her, thin haze, the tunnel glowing cyan behind. Cinematic film still, anamorphic, fine grain, no text.
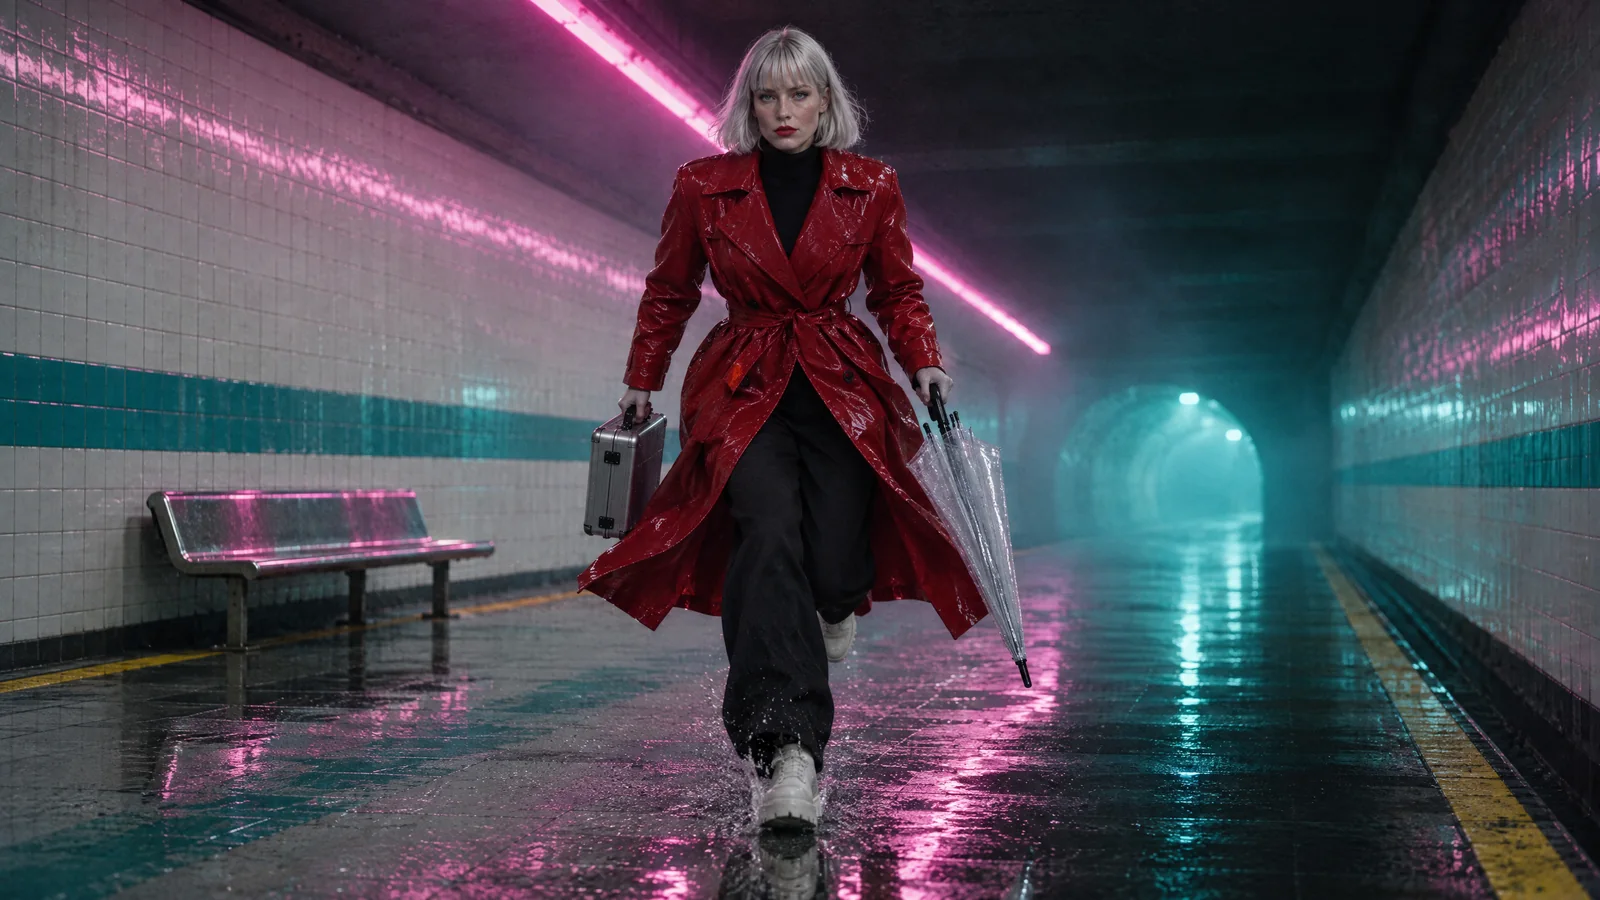
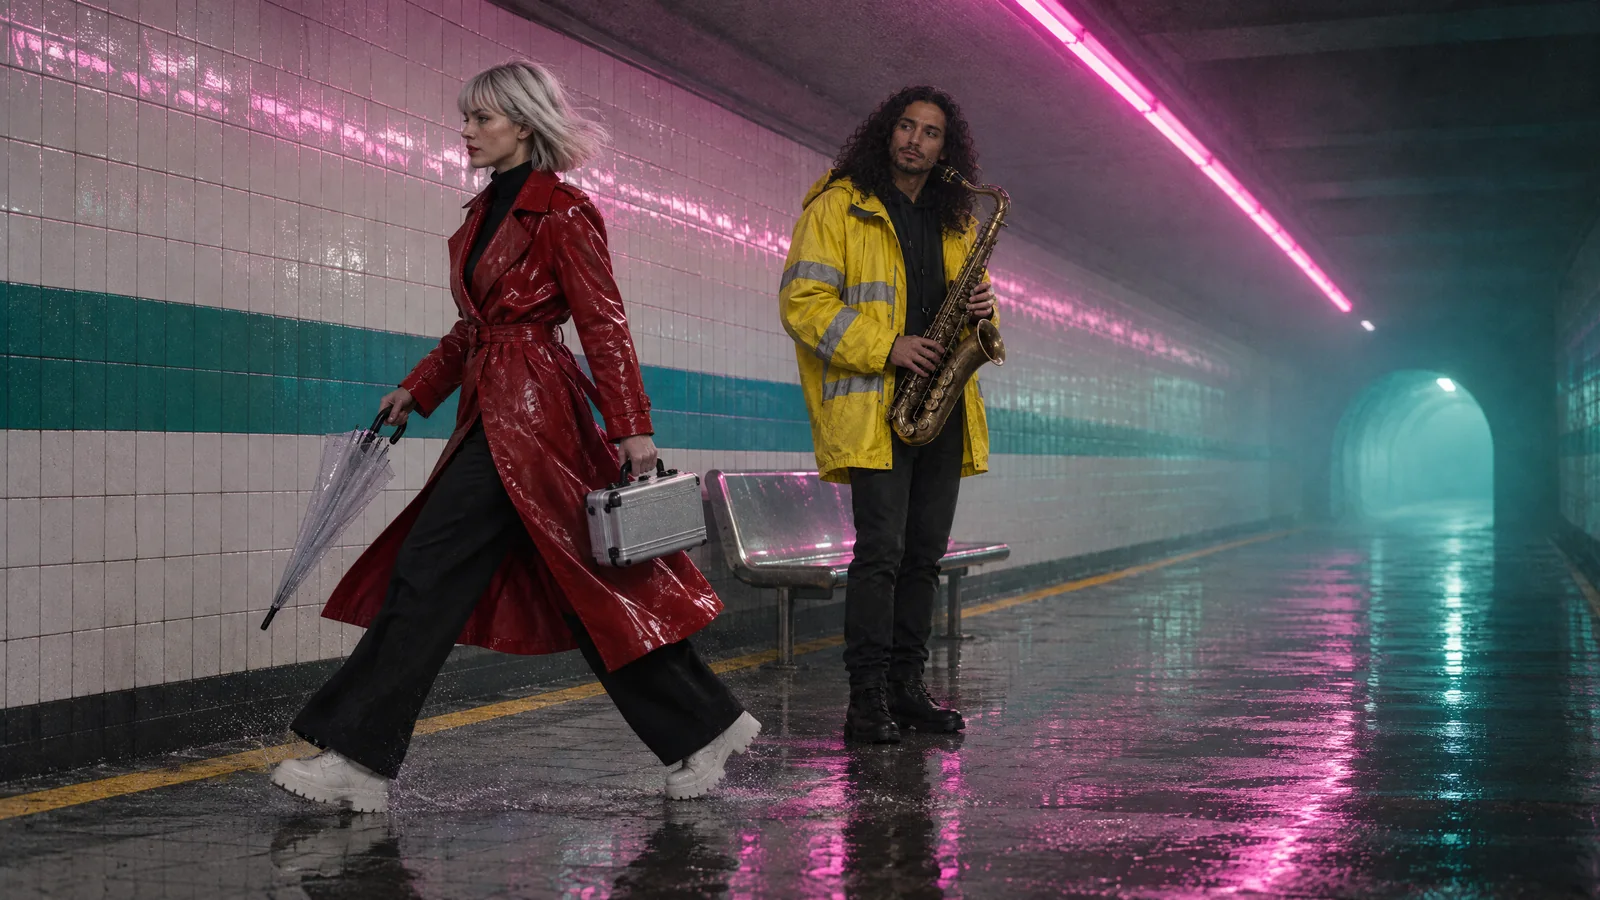
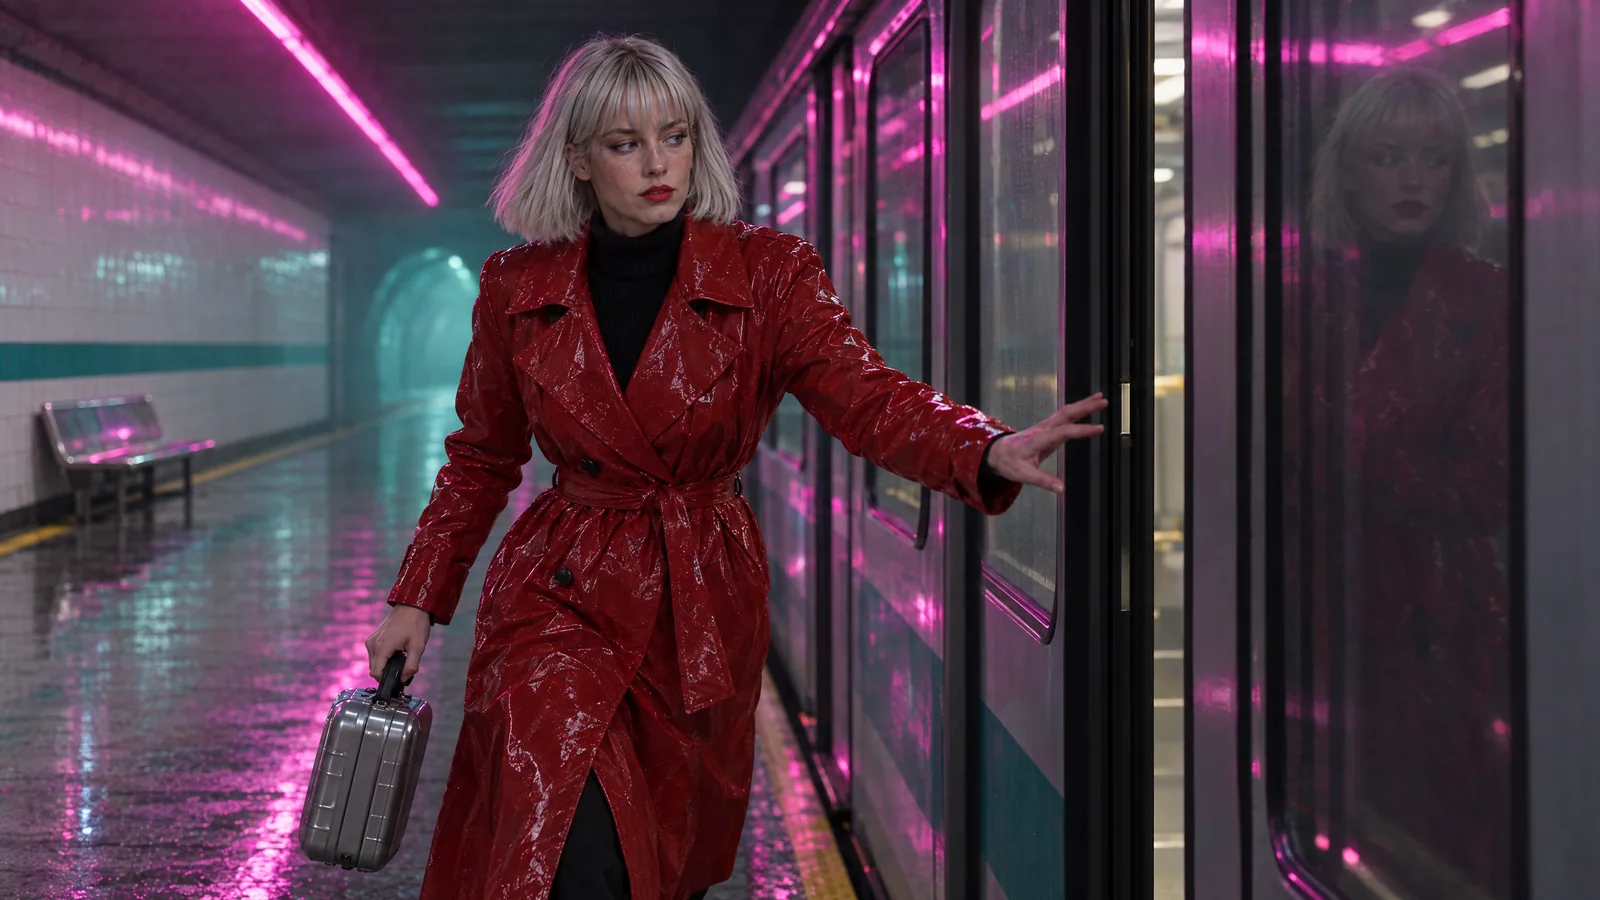
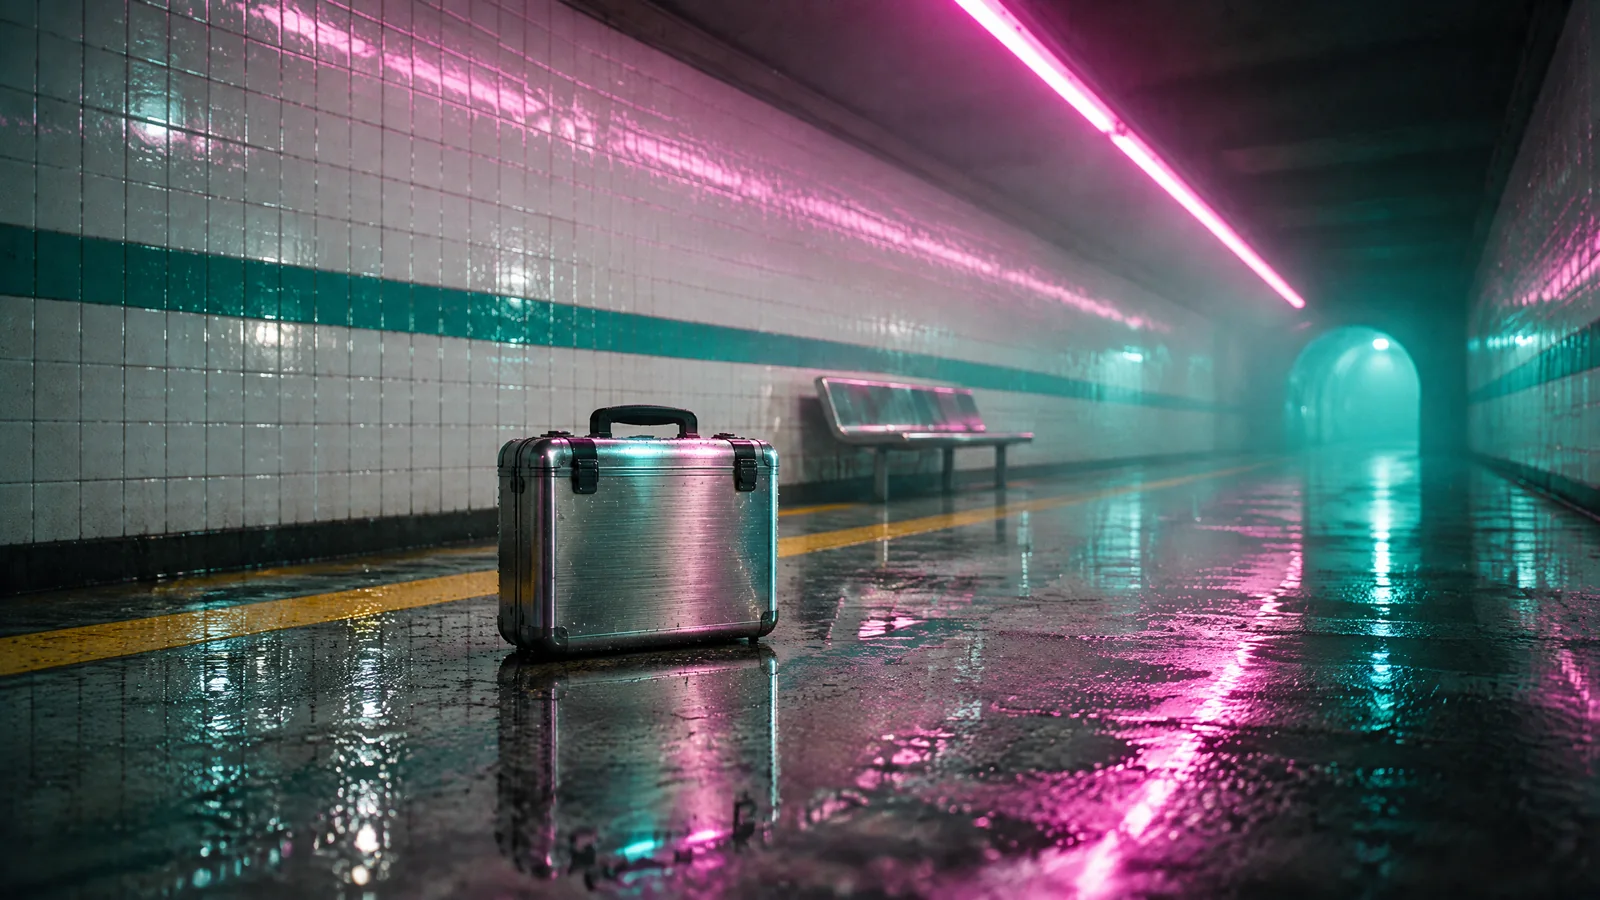
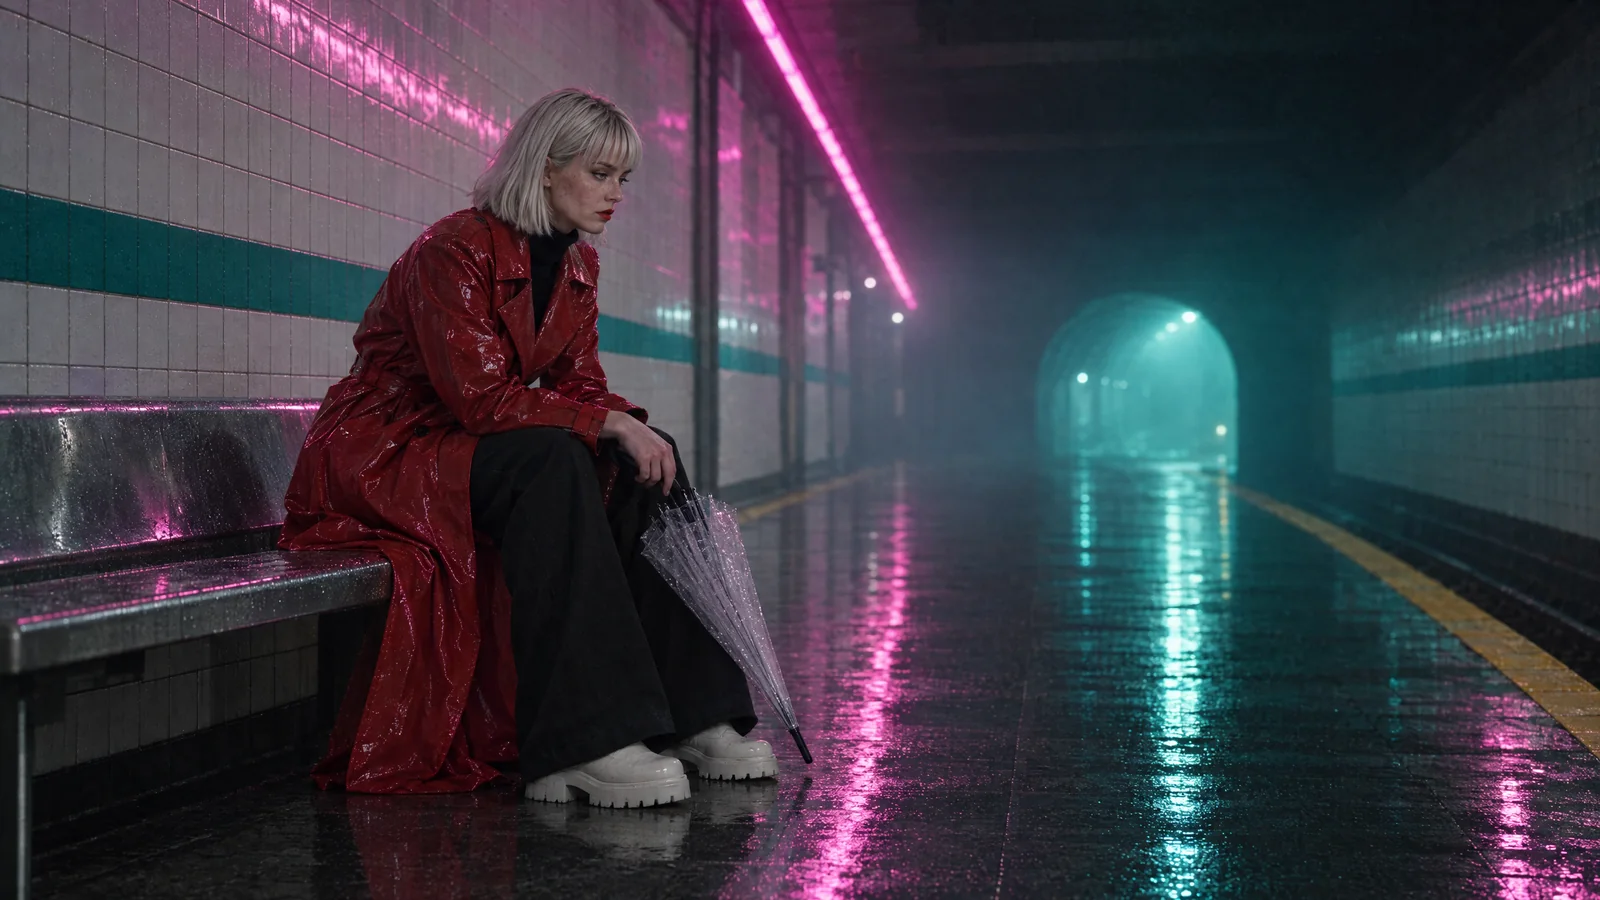
Tip:Name who goes where when two people share a frame. Frame 2 says who passes whom, where Ozzy stands, and what she carries. Our first version of it left the case out of the sentence, so the frame had no case. With two characters in the cast, the composer numbers them in the order you picked them, and the prompt's @Vale and @Ozzy resolve to those references.
Animate the frames into shots
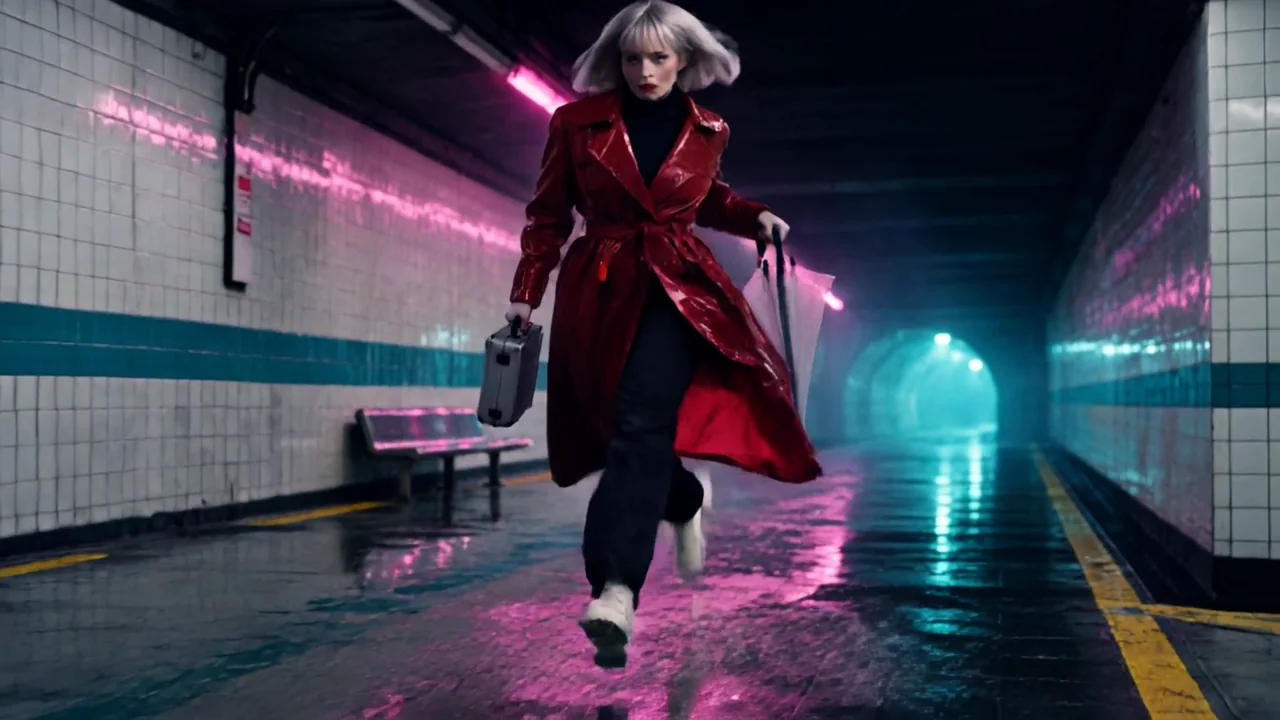
Open the video composer, choose Animate an image under Start from, press Add start frame, then Pick an asset and choose the frame from your Library. It becomes the first frame of the clip. Write the action that happens from that frame, press a camera move chip, set the length, and generate. We used Kling v3 for the sprint, the shot with the most movement, and Seedance 1.5 Pro at 720p for the other four, 4 to 6 seconds a shot, and cut two of them shorter in Studio. For a run, a jump or anything with weight, animate the frame on Kling v3 or Seedance 2.5.
She sprints straight towards the camera along the platform, red vinyl coat flying open, the chrome case in her right hand and the folded umbrella in her left, white boots splashing the wet tiles, hair bouncing with each stride, the magenta neon and the cyan tunnel glow behind her. Real sprint physics, cinematic, anamorphic, fine film grain.
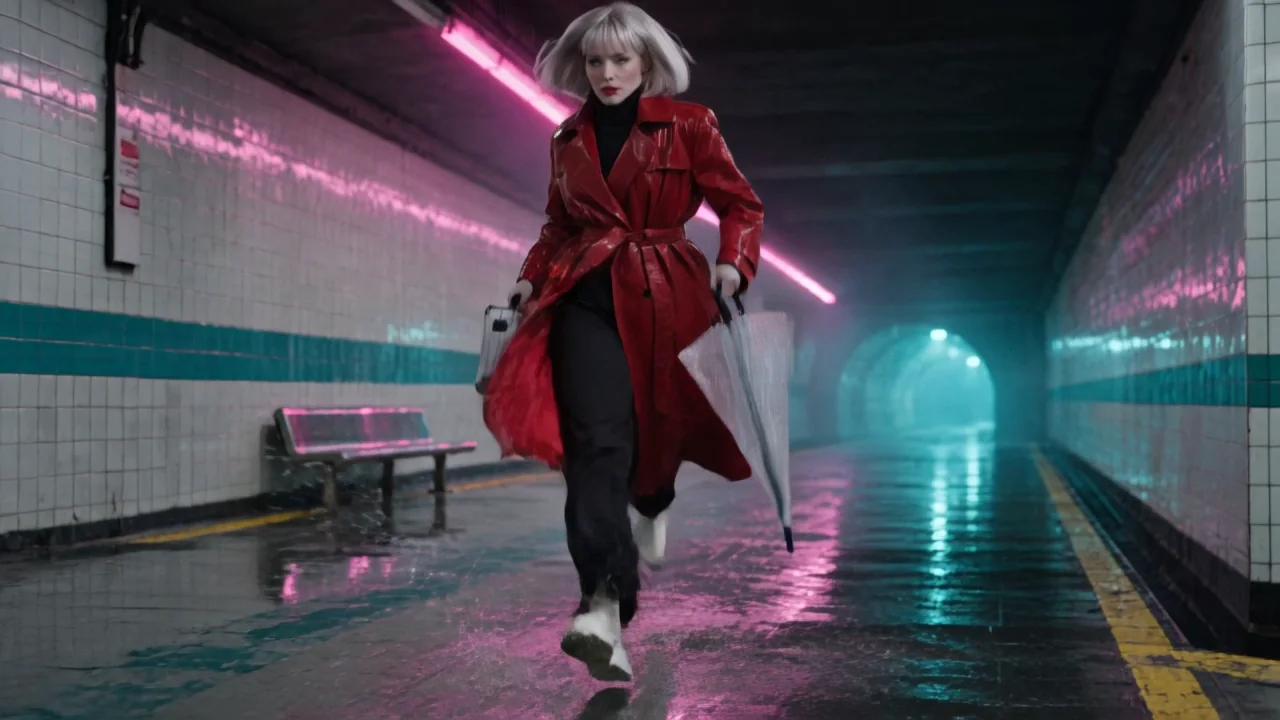
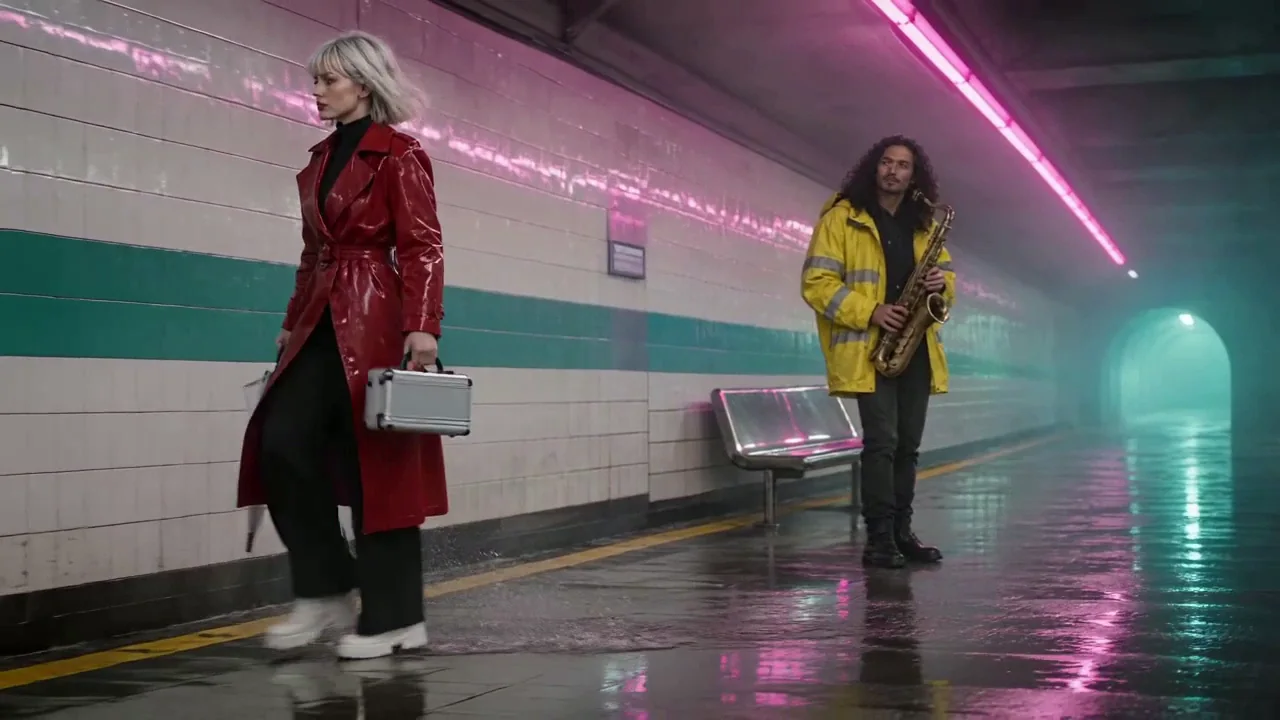
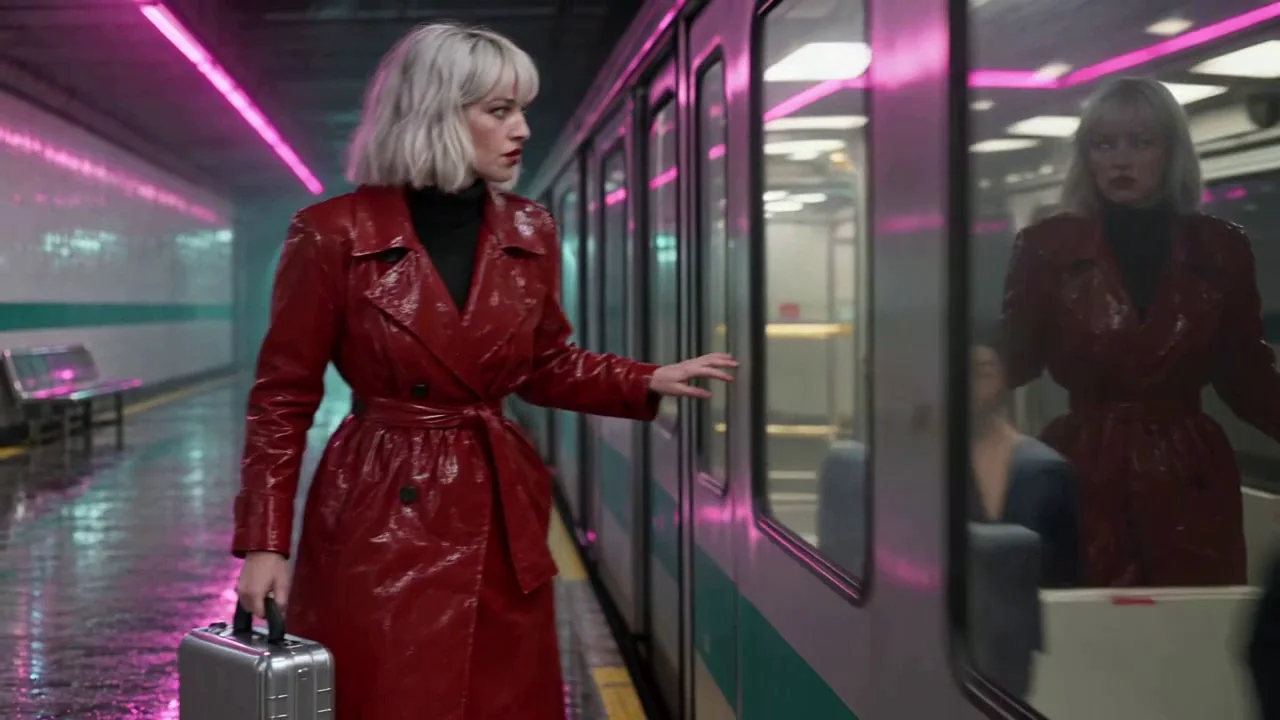
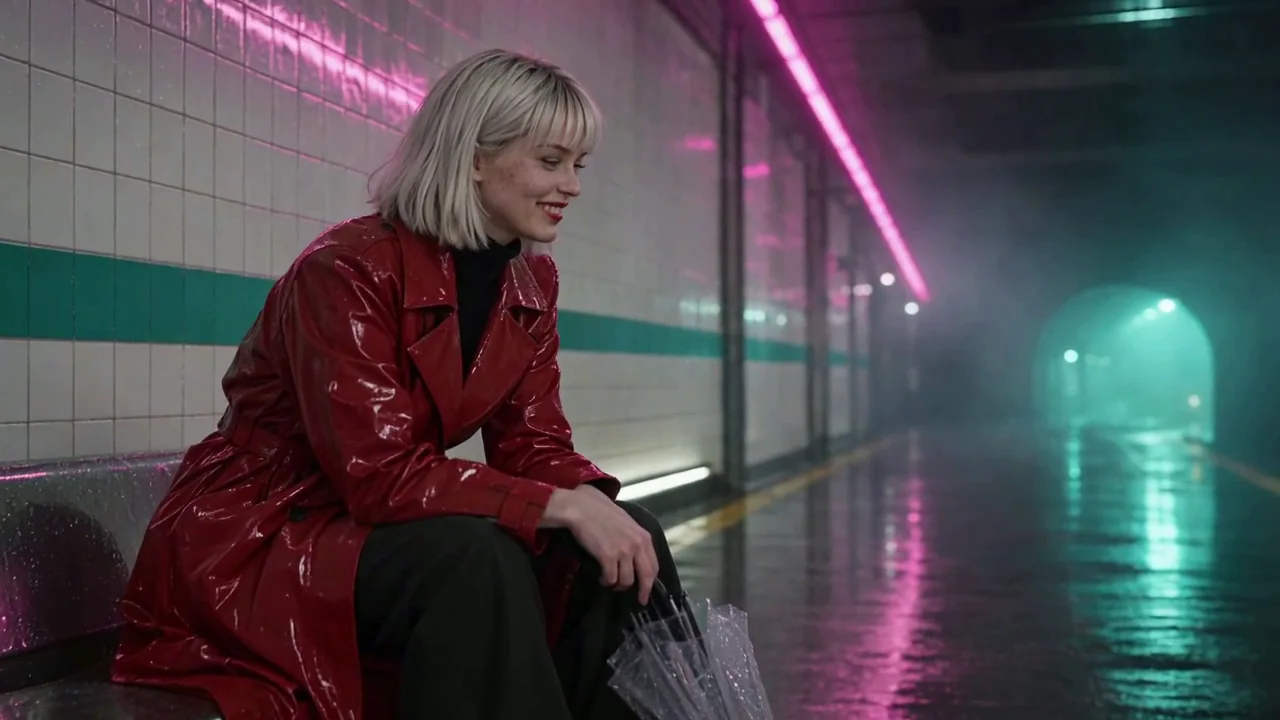
Watch for this:Why frames first, and not the character straight into the video model. We tried the direct route twice. Seedance 2.0 Fast refused every request that carried Vale's reference, saying the reference looked like a real person, and refunded each one. Seedance 1.5 Pro accepted her, but used her 3:4 portrait as the clip's first frame, so a 16:9 request came back portrait-shaped. A 16:9 frame from the image composer, animated, sidesteps both.
Score and effects
The film has no dialogue, so sound is two runs in the audio composer: a score from Lyria 3.5 and two effects from ElevenLabs Sound Effects v2, the doors closing and the running boots. Describe the score by tempo and mood, and each effect as one event.
A tense, driving electronic cue at 118 bpm for a short film about missing the last train: pulsing arpeggiated synth, deep sub bass, a ticking hi-hat, a sudden drop to a single warm pad at the end, no vocals, cinematic neon night
Subway train doors closing: a two-tone chime, a pneumatic hiss, doors thud shut, then the train accelerates away through a tunnel with a rising electric whine and echo, station reverb
Cut, grade and export in Studio
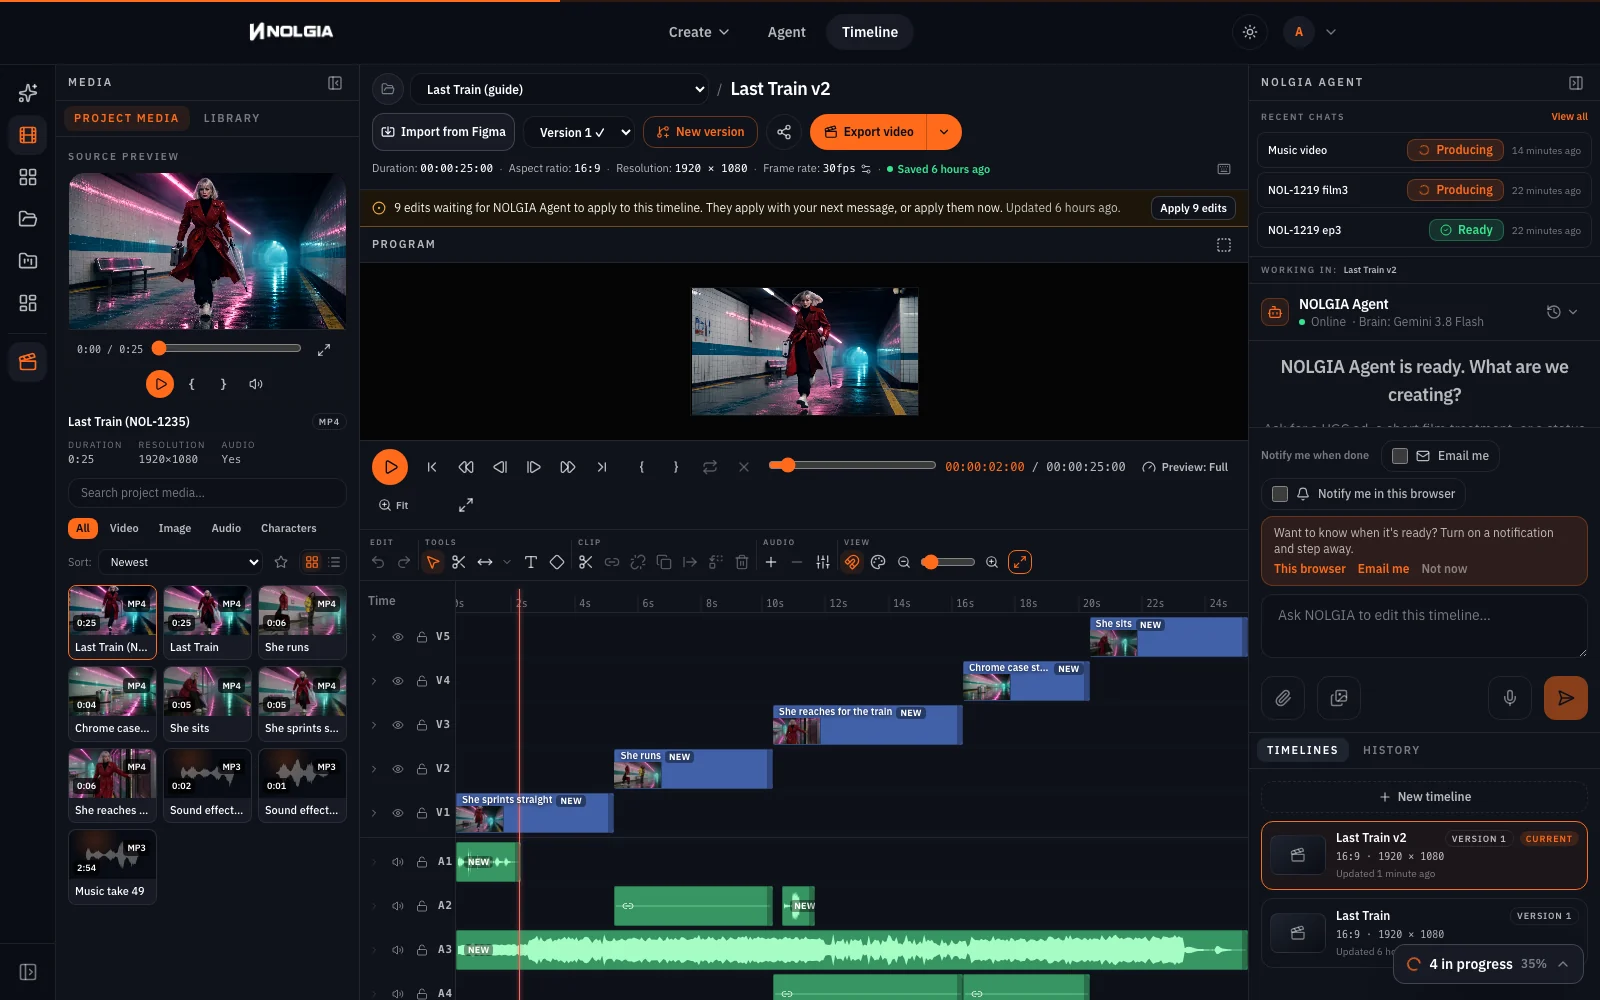
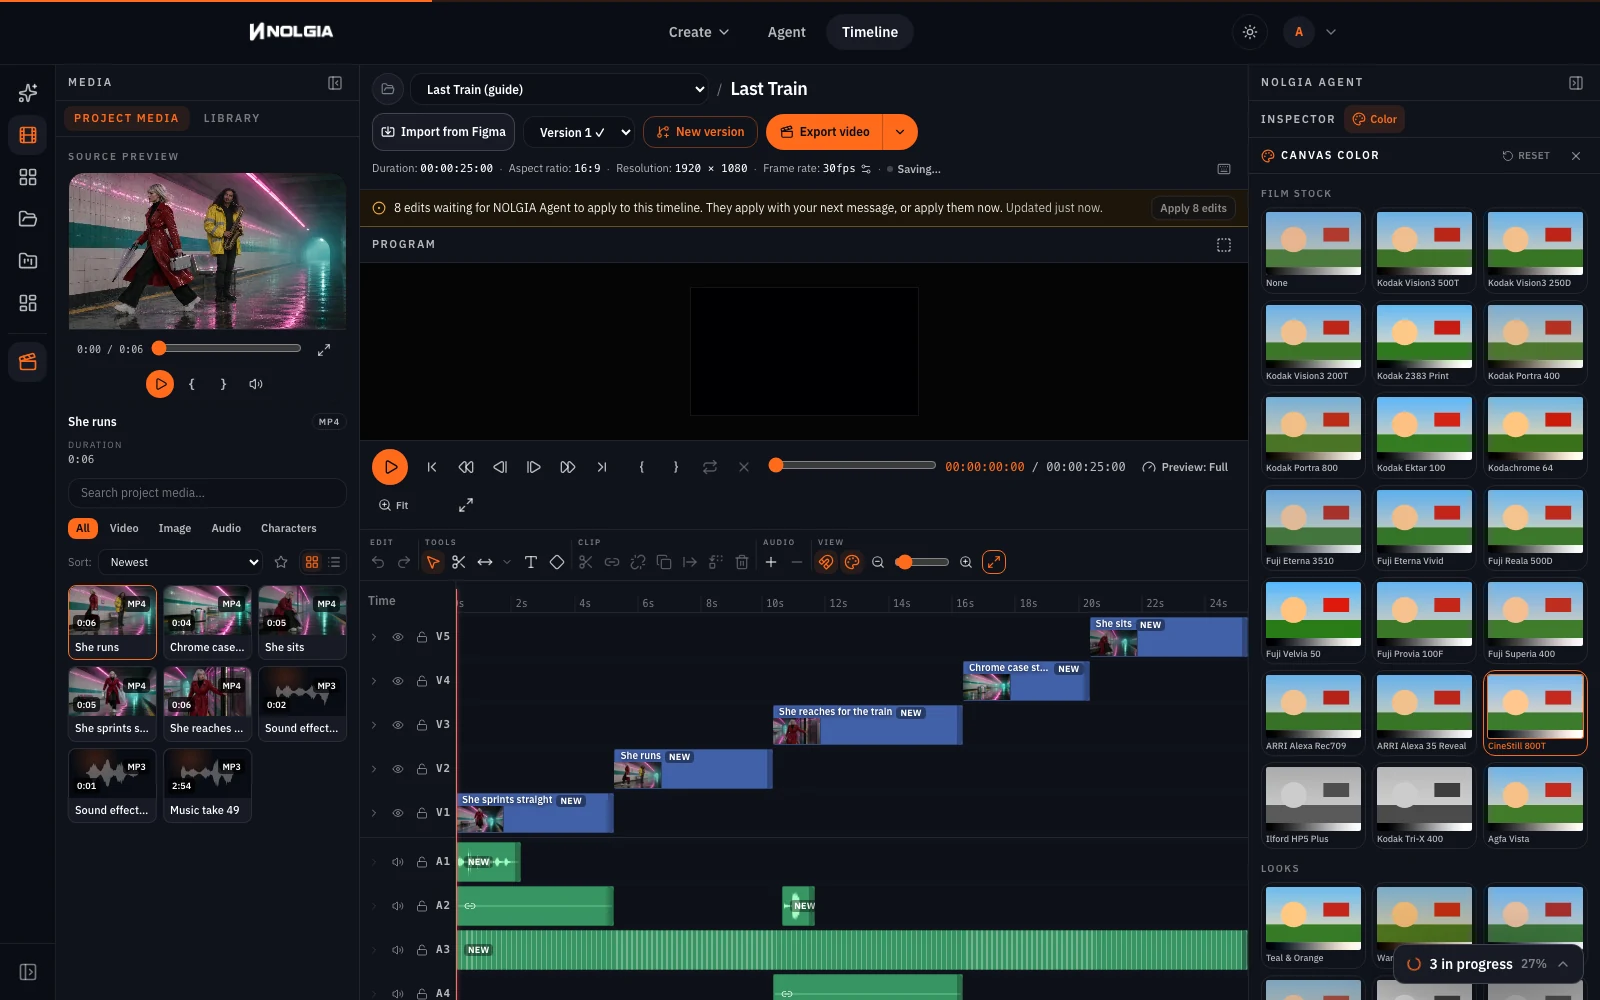
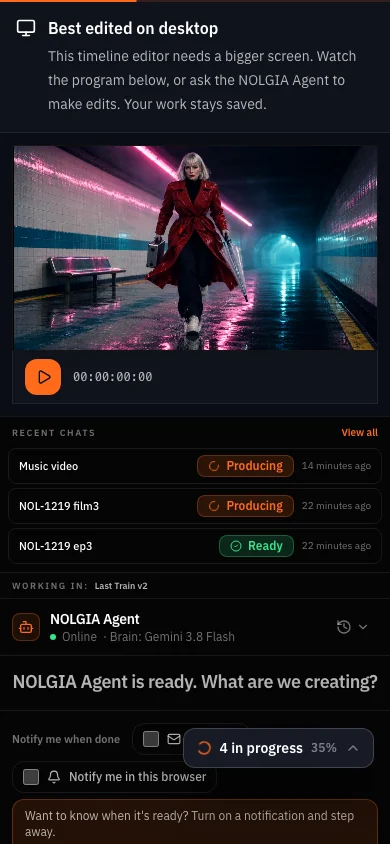
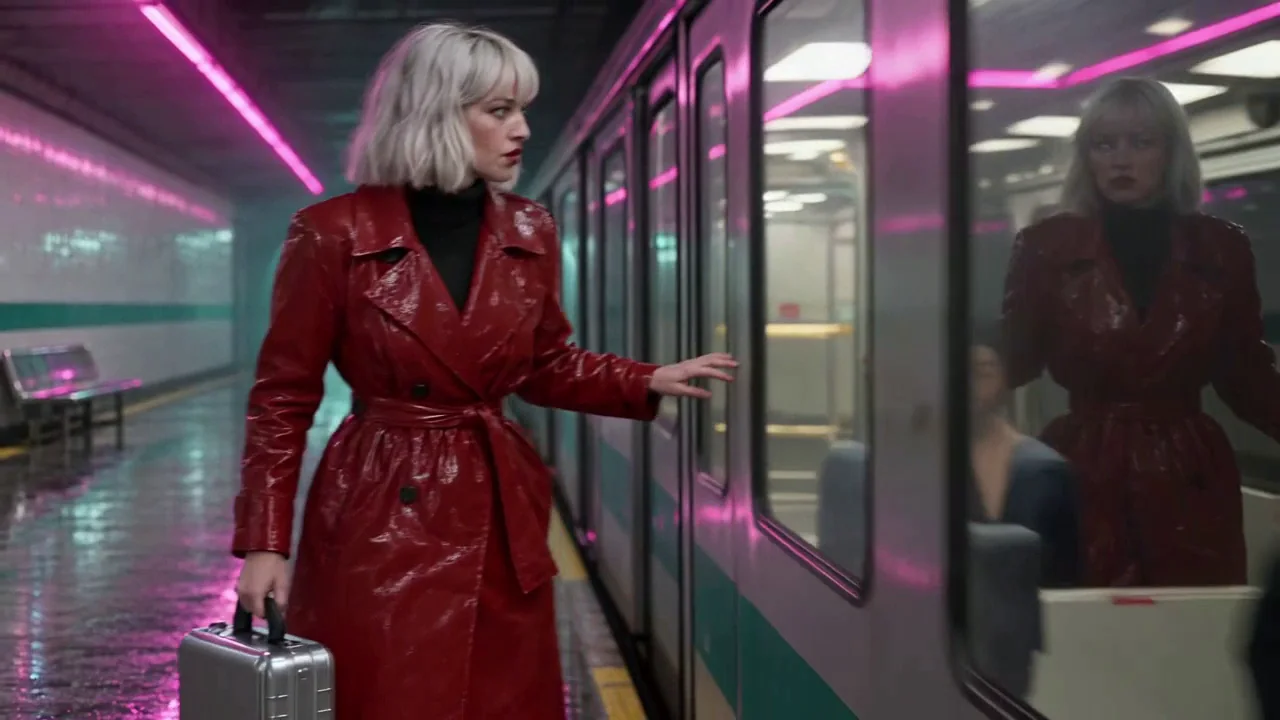
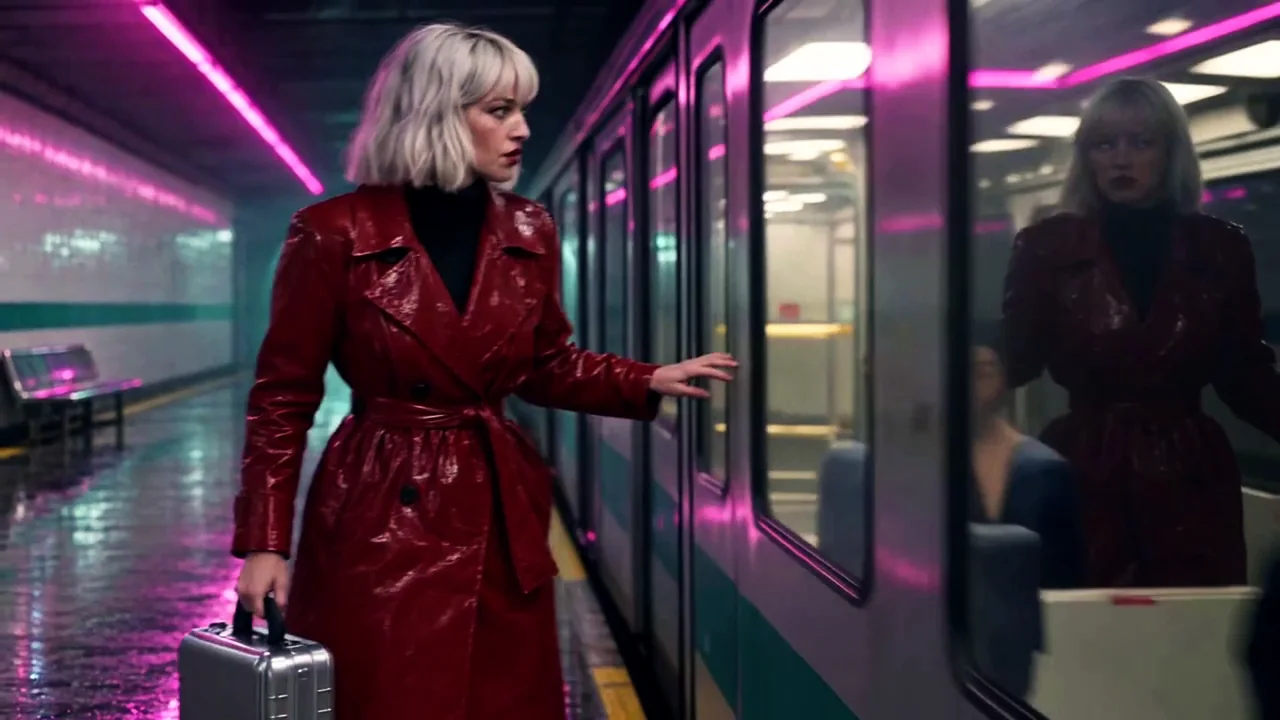
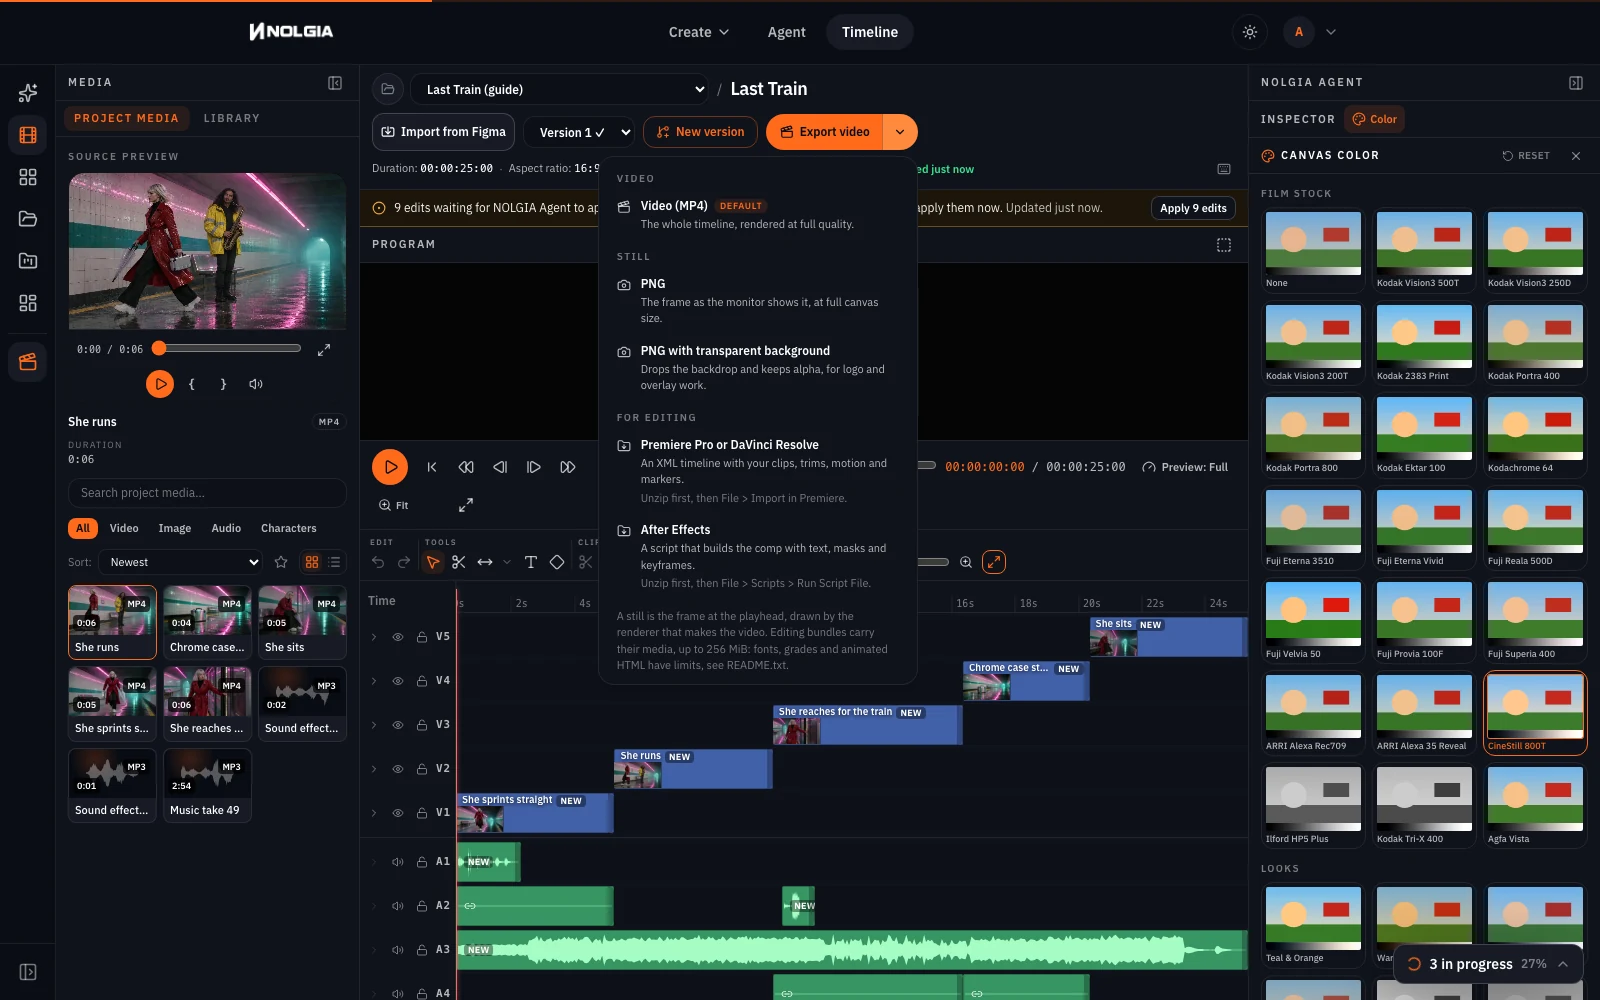
Open Timeline, press New timeline, name the project and the timeline, then open Library in the Media column and add the five shots in order with their + buttons: each press adds the clip at the playhead on a fresh track, and End moves the playhead to the end of what is there. For shot 2, drag the Source Preview to 5 seconds and press Mark Out before the +, so only its first 5 seconds come in. Add the score at the start; it is 2 minutes long, so park the playhead at the end of the picture, press C with nothing selected to split it, click the tail and press Delete. Add the two effects where the boots land and where the doors close. Then open Color from the toolbar with nothing selected and pick one film stock for the whole timeline; ours is CineStill 800T.
 BeforeAfter
Export video renders the MP4 in a minute or two; it lands in your Library at no charge. The arrow beside it opens the Export menu; Premiere Pro or DaVinci Resolve downloads one ZIP with sequence.xml, a media folder with every clip and track, your grade as luts/canvas.cube and a README. Unzip it, then import sequence.xml. Ours came with one warning per video clip: the XML assumes each clip matches the canvas size, so use Scale to Frame Size in Premiere if a clip looks wrong. The export post covers the rest of what carries over.
Which tool for which job
| Stage | Where | Model we used |
|---|---|---|
| Cast | Characters, Generate | GPT Image 2.5 Flare |
| Set and prop stills | Image composer, then Locations | Seedream 5.0 Pro |
| Frames | Image composer with Characters and Location attached | GPT Image 2.5 Flare |
| Shots | Video composer, Animate an image | Kling v3 for the sprint, Seedance 1.5 Pro for the rest |
| Insert with a prop | Image composer for a frame of the prop on the set, then Animate an image | GPT Image 2.5 Flare, Seedance 1.5 Pro |
| Score and effects | Audio composer | Lyria 3.5, ElevenLabs Sound Effects v2 |
| Cut, grade, export | Studio | No model, no charge |
Where you still regenerate
- A model that refuses your cast. Seedance 2.0 Fast refused Vale's reference on every try. Switch models rather than rewording; the refusal names the checker, not your prompt.
- A portrait as a start frame. On Seedance 1.5 Pro a character attached directly becomes the first frame. Go through a 16:9 frame.
- The set repeating. The second take of shot 2 ran past the busker twice by 4 seconds. Shorter shots, or cut where it repeats.
- A prop that migrates or arrives. The first take of shot 2 gave Vale the saxophone by 2 seconds; the first take of the insert had the case fade in from nothing. Say who holds what in the shot prompt, and for a static prop put it in the frame you animate from.
- Faces. Wardrobe, hair and props hold across the five shots; whether the face is one person is not measured here.
What it costs
Frames are priced per image, shots by model, length and quality, the score and each effect per run. Studio, the cut and the export are free. Live rates for the models in this film:
GPT Image 2.5 FlareEvery plan
Per image
Native 8 credits · 2K 21 credits · 4K 58 credits
Seedream 5.0 ProEvery plan
Per image
1K 5 credits · 2K 9 credits
Kling v3Pro and up
Per 5s clip (audio on by default)
720p 35 credits · 1080p 47 credits · 4K 117 credits
Seedance 1.5 ProPro and up
Per 5s clip (audio on by default)
480p 7 credits · 720p 15 credits · 1080p 33 credits
Lyria 3.5Every plan
Per generation
Standard 5 credits
ElevenLabs SFXEvery plan
Per generation
Standard 4 credits
Read live from the catalog when this page loads. Every price is shown before you generate. See every rate.
Checklist
- Character, location and prop saved before the first frame; one sentence each, reused verbatim.
- One 16:9 frame per shot with the cast and the location attached; wardrobe and props checked at full size.
- Each frame animated at 4 to 6 seconds with one action and one camera move.
- Score by tempo and mood; effects one event each.
- Trimmed where the model drifts; one grade on the timeline; exported once.
Try it yourself
Save your own character and location, then use the frame 1 prompt with the cast and location attached on GPT Image 2.5 Flare at 16:9, and the shot 1 prompt on Kling v3 in Animate an image with the Locked off chip. We ran the frame 1 recipe again on the live composer after the guide was written: it came back on the same platform with the same coat, bob, boots, umbrella and case, in a different stride and with the coat belted closed, although the prompt says it flies open. Expect the pose and the small things to roll; the character and the place are what the references hold. The stills below are our cast, set and prop; the frames and shots are above.
The ingredients
Questions and answers
- Is Vale one person in every shot?
- Her coat, hair, boots, umbrella and the case hold across the five shots, and the consistency guide measures that. Whether it is one person from shot to shot is not something we have measured, so we do not claim it.
- Why make a frame before every shot?
- A frame costs a fraction of a video take and is where the wardrobe, the props and the framing get fixed. It also avoids two problems: a video model refusing a character reference, and a model using a portrait as the first frame.
- Which video model should I use?
- For the running shot, Kling v3: it keeps a sprint and the props in her hands believable. We planned Seedance 2.0 Fast and it refused every character reference, so the quieter shots are Seedance 1.5 Pro from frames. For anything with weight, use Kling v3 or Seedance 2.5.
- How long can the film be?
- As long as your shot list. Twenty five seconds was five shots of 4 to 6 seconds. Keep shots short; the models drift and repeat past about 5 seconds.
- Can the characters speak?
- This film has none. For lines, record them in the audio composer and lay them under the cut, or use a model with native speech for a single shot.
- Can I finish it in Premiere or Resolve?
- Yes. Studio's Export menu downloads one ZIP with the sequence, the media and the grade as a LUT. Unzip it first, then import the sequence.
Start with the cast
Open CharactersRelated guides
Filmmaking
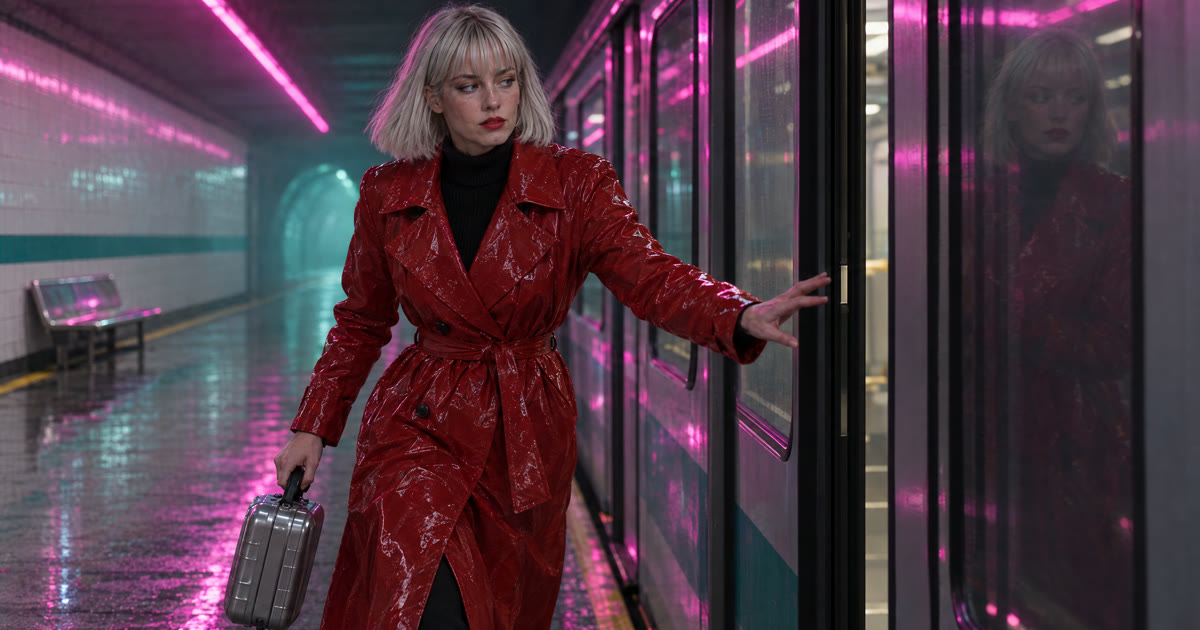
Keep characters and locations consistent across shots
A saved character, a saved location and one repeated sentence per prop: what actually held across five shots of one film, measured object by object and by colour, and the two gaps that did not.
· 10 min read
Filmmaking
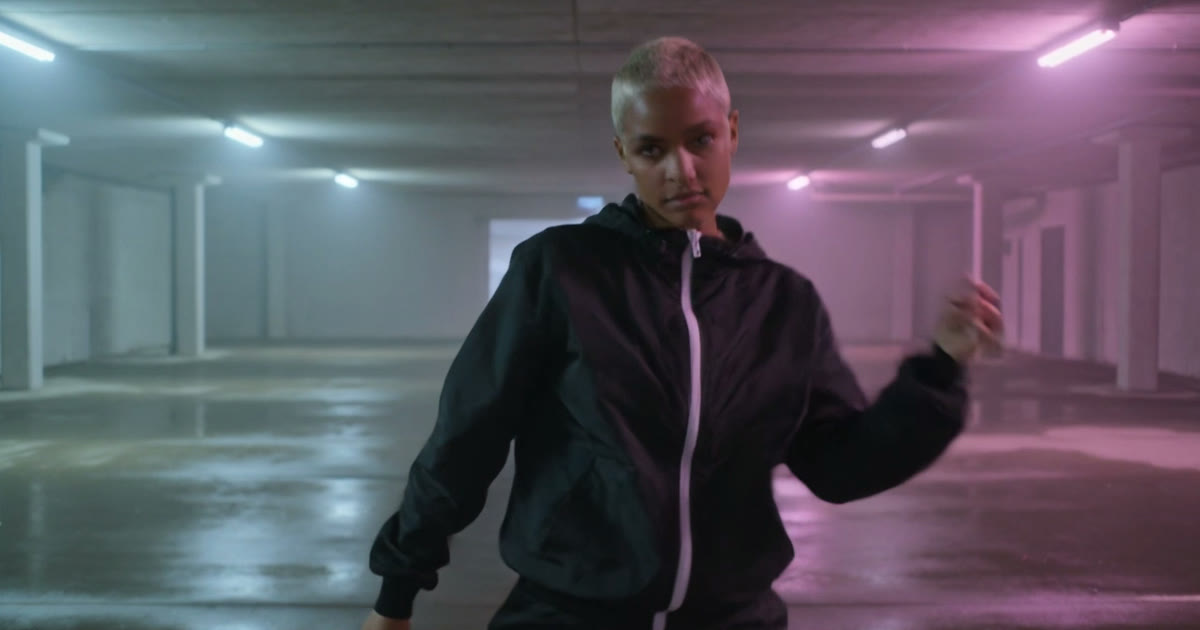
Make a video from a script, step by step
Split a 60 to 90 word script into shots, generate each one in the video composer with a camera move, record the narration, cut it in Studio and export. Every step run for real.
· 12 min read
Filmmaking
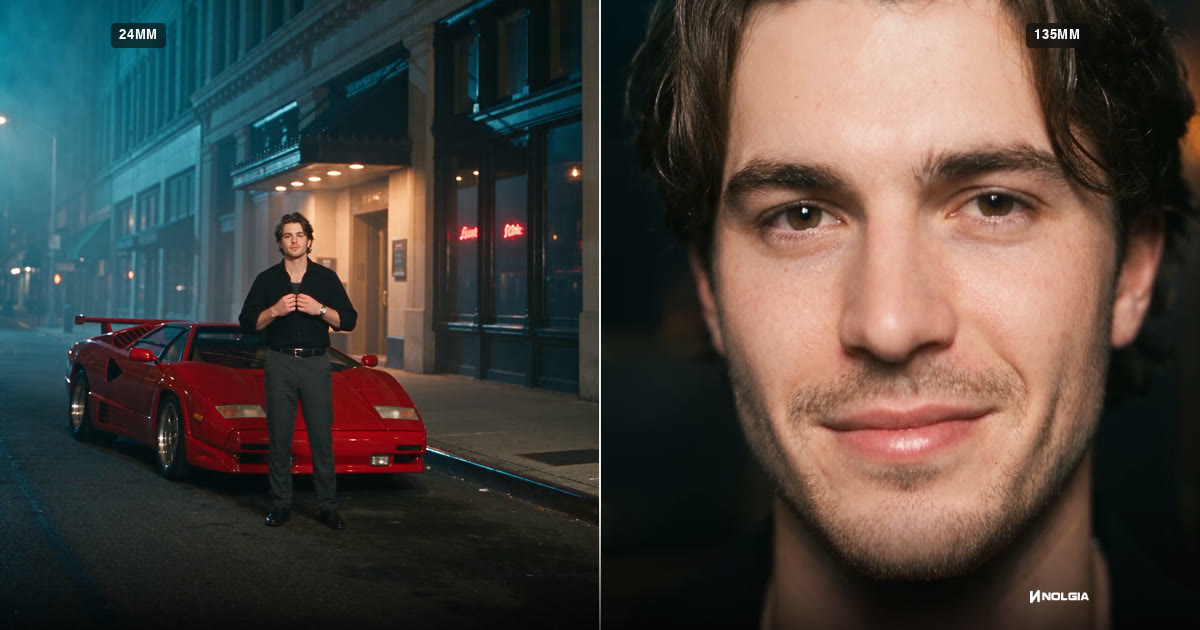
Focal length for AI video: 24mm, 70mm, 135mm and 200mm
What 24mm, 70mm, 135mm and 200mm do to a frame, how to prompt each in Seedance 2.5, and how the focal length reel was made, with every prompt as it was sent.
· 15 min read